



Table of Contents
- How to Fix Awning Fabric: Assessing Damage Before You Repair
- Cleaning Awning Fabric Before Any Repair
- What’s in an Awning Fabric Repair Kit
- Choosing Awning Repair Tape for Small Holes and Tears
- Using Awning Fabric Glue for Seams and Edges
- Replacing Retractable Awning Fabric: When DIY Stops Making Sense
- Frequently Asked Questions
Last Updated: October 4, 2026
How to Fix Awning Fabric: Assessing Damage Before You Repair
Learning how to fix awning fabric starts with one honest look at the damage. Awnings live outside all year.
This guide covers the full repair process, from damage assessment to patching to knowing when to call a pro.
Most small awning fabric repairs are doable in an afternoon with basic tools. But the repair only lasts if you match your method to the damage type.
Tears, Punctures, and Seam Separation: What You’re Looking At
Not all damage is the same. And the fix changes based on what failed.
- Tears are long rips, usually along a seam or fold line. They spread fast under wind load.
- Punctures are small holes, often from branches, hail, or sharp edges on the awning frame.
- Seam separation is when the stitching pulls apart. The fabric itself is fine, but the thread has failed.
The repair method differs for each. Tape works on punctures. Glue works on seams. Tears often need both.
Repair or Replace? A Severity Decision Tree
Use this test before you buy anything:
- Damage under 2 inches, no seam involved → tape patch, DIY
- Damage 2-6 inches, clean edges → fabric patch with adhesive, DIY
- Seam separation under 12 inches → fabric glue, DIY
If the fabric cracks when you pinch it, no patch will hold.
Cleaning Awning Fabric Before Any Repair
Adhesive and tape only stick to clean, dry fabric; skip this step and your patch peels within weeks.
Here’s the cleaning process:
- Brush off loose dirt with a soft brush.
- Mix mild soap with warm water.
- Scrub the damaged area and a few inches around it with a sponge.
- Rinse with clean water.
- Let it dry fully, at least 2 hours in direct sun.
Never use harsh detergents or bleach. They break down the fabric coating and make the next repair harder.
For stubborn mold or mildew, a diluted vinegar solution works well. Rinse thoroughly after.
Clean at least 3 inches past the damage edge. Adhesive needs clean fabric to bond, and dirt wicks outward from old tears.
What’s in an Awning Fabric Repair Kit
A basic awning fabric repair kit costs little and covers most small jobs. Have on hand:
- Repair tape for small holes and punctures
- Fabric adhesive or glue for seams and edges
- Patch material (vinyl or acrylic, matched to your fabric)
Buy these as a kit or piece them together, and match the patch material to your awning fabric type. A vinyl patch won’t bond well to acrylic fabric, and vice versa.
Choosing Awning Repair Tape for Small Holes and Tears
Awning repair tape is the fastest fix for small damage, but “repair tape” is not one product. Backing, adhesive chemistry, and thickness differ, and the wrong combination is the most common reason a patch lifts within a season. Match the tape to the fabric, not the hole size.
Match the Tape to the Fabric
- Vinyl (laminated or coated) awnings: Use a vinyl-facing tape with a clear or color-matched PVC backing and a rubber- or acrylic-based pressure-sensitive adhesive. Vinyl is non-porous, so the adhesive bonds to the surface film only. A tape designed for canvas will sit on top of the vinyl and slide.
- Acrylic (solution-dyed, woven) awnings: Use a woven acrylic or fabric-backed tape with an acrylic adhesive. Acrylic fabric is breathable and slightly textured, so a stiff vinyl tape will not conform to the weave and will peel at the edges. A fabric tape moves with the weave.
- Polyester or olefin blends: Treat these like acrylic for tape selection. The weave, not the fiber, drives adhesion.
If you cannot identify the fabric, check the underside or the original spec tag. Most retractable awnings use a vinyl laminate or a solution-dyed acrylic, and the two do not share tape.
What to Look For on the Label
- Adhesive type: Acrylic adhesive handles UV and temperature swings better than rubber. Rubber grabs faster but degrades sooner in sun.
- Backing thickness: A 10-12 mil backing conforms to curves and folds. Thicker backing is stiffer and better for flat panels but peels at seams.
- UV rating: Look for a tape rated for outdoor exposure. Indoor-rated tape will yellow and lose tack within one summer.
How to Apply Awning Repair Tape
- Clean and dry the area fully; adhesive will not bond to dust, mold residue, or old wax.
- Cut a patch 1-2 inches larger than the damage on all sides.
- Round the corners, since square corners catch wind and peel first.
- Peel the backing and press the patch on, starting at one edge.
- Smooth from the center outward to push out air bubbles.
- Press firmly with a roller or hand for 30 seconds; friction heat helps the adhesive wet out.
Temperature and Cure
Most pressure-sensitive awning tapes need surface temperatures above 50°F to bond and reach full strength in 24 hours. Below 50°F, the adhesive stays tacky but never flows into the weave, and the patch lifts at the first strong wind. In cold weather, warm the fabric with a hair dryer on low, apply the tape, and keep pressure on it until it cools.
Do not stretch the tape as you apply it. Stretching thins the adhesive layer and creates tension that pulls the patch off as the awning rolls. Lay it flat and let the adhesive do the work.
For punctures under 1 inch on vinyl, a drop of clear vinyl adhesive under a small tape patch adds a mechanical bond that survives repeated rolling. On acrylic, skip the adhesive and rely on the tape alone, since glue can stiffen the weave and cause a crease.
When Tape Is the Wrong Tool
Tape is for punctures and short, clean tears with intact edges, not for:
- Seam separation, where the thread has failed and the fabric edges have pulled apart
- Tears longer than about 6 inches, where wind load concentrates at the tape edges
- Damage within 2 inches of a seam or the roller attachment, where flexing breaks the bond
For those cases, move to a fabric patch with adhesive or a sewn repair, covered in the sections below.
Using Awning Fabric Glue for Seams and Edges
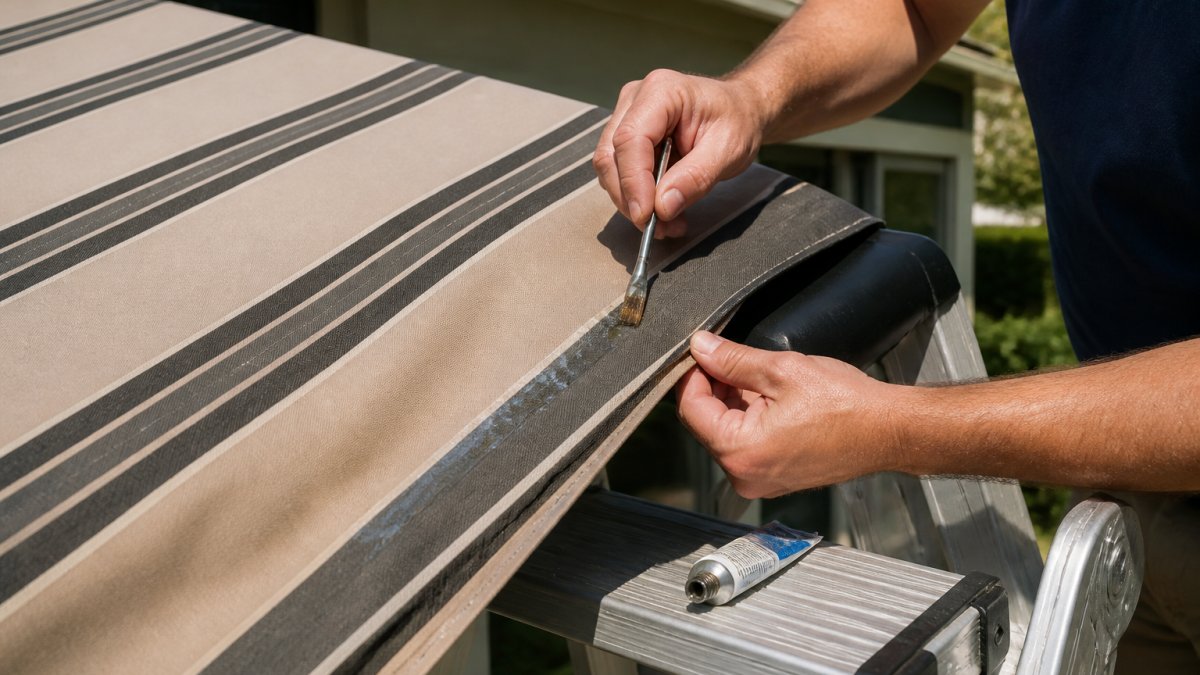
Awning fabric glue is the right tool for seam separation and edge repairs, but the adhesive you choose and the conditions you cure it in determine whether the repair lasts one season or five.
Call us today for a free estimate →
Pick the Adhesive for Your Fabric
- Vinyl awnings: Use a vinyl-specific adhesive or a flexible urethane adhesive. Vinyl adhesives chemically weld to the vinyl surface. A general-purpose craft glue will not bond and will peel cleanly off.
- Acrylic awnings: Use a flexible acrylic or urethane adhesive labeled for outdoor fabric. Acrylic weave needs an adhesive that stays pliable so the seam can flex without cracking.
- Marine and RV applications: Use a marine-grade adhesive rated for UV and salt exposure. Standard outdoor adhesives break down faster in salt air.
Avoid rigid epoxies and cyanoacrylate (super glue). Both cure hard and crack the first time the awning rolls.
How to Repair a Seam with Fabric Glue
- Clean the seam area and let it dry fully; adhesive will not bond to mold residue or old wax.
- Open the seam so both fabric edges are exposed, trimming old thread flush with small scissors.
- Apply a thin, even bead of glue along both edges; a thick bead traps solvent and slows cure.
- Press the edges together firmly and hold for 30 seconds.
- Wipe off excess glue with a damp cloth before it sets.
- Clamp or weight the seam if possible; binder clips with cardboard under the jaws work well.
- Let it cure fully before retracting the awning.
For edges pulled away from the frame, apply glue along the fabric edge, press it back into place, and hold it with painter’s tape until it sets; remove the tape after 24 hours.
Cure Time, Temperature, and Humidity
Cure time is not a suggestion; a rushed seam repair fails in the first windstorm. Working targets:
- Surface dry (do not touch): 30-60 minutes
- Handling strength (can move the awning gently): 24 hours
- Full cure (can retract and expose to wind): 48-72 hours
Below 50°F, most flexible adhesives stop curing. In cold weather, work indoors if the awning is removable, or use a heat lamp to keep the repair area warm through the cure window.
Curing time matters more than application. Give every glue repair a full 48-72 hours before retracting the awning or exposing it to wind. A seam that feels dry at 24 hours is still developing bond strength.
Post-Repair Testing
Before you call the repair done:
- Wait the full cure window.
- Gently flex the seam by hand. It should move with the fabric, not crack or separate.
- Retract and extend the awning once, slowly, and watch the seam for lifting.
- Check again after the first rain. Water finds any gap the eye misses.
- Re-check after the first windy day. Wind load is the real test.
If the seam lifts at any step, the adhesive did not bond. Clean the area, remove the failed adhesive, and reapply; do not simply add more glue on top.
Why Seams Fail in the First Place
Seam separation is usually a symptom, not the root problem. Common causes:
- UV degradation of thread: Polyester thread loses strength after years of sun exposure. The fabric is fine; the thread is not.
- Abrasion at fold lines: Every retraction rubs the seam against itself. Over time the thread wears through.
- Tension imbalance: A misaligned roller or a bent arm puts uneven load on one seam, which fails first.
If the same seam keeps failing after repair, the cause is mechanical, not adhesive. Check roller alignment and arm tension before repairing again.
Replacing Retractable Awning Fabric: When DIY Stops Making Sense
Signs it’s time to replace instead of repair:
- Multiple tears across the fabric
- Fabric that’s brittle, faded, or cracking
- Damage along the roller attachment
DIY replacement is possible on some models, but most retractable awnings need a pro.
This is where we come in. A to Z Awnings & Marine Canvas handles fabric replacement on retractable and folding-arm awnings, plus marine canvas.
Marine canvas repairs add another layer: salt air and UV exposure wear fabric faster, so patches fail sooner on boats than on patios.
If you’re weighing repair versus replacement, get a professional assessment first.
| Damage Type | DIY Fix | Pro Repair | Replace Fabric |
|---|---|---|---|
| Small puncture (under 2 in) | Repair tape | Not needed | No |
| Small tear (2-6 in) | Fabric patch + glue | Optional | No |
| Seam separation (under 12 in) | Fabric glue | Optional | No |
| Large tear (over 6 in) | Not advised | Yes | Sometimes |
| Brittle or cracking fabric | No | No | Yes |
| Multiple tears or seam failures | No | Assess first | Usually yes |
Frequently Asked Questions
How can I repair a rip in my awning fabric?
Clean the area with mild soap and water, let it dry completely, then apply a peel-and-stick awning repair tape or a fabric patch that overlaps the rip by at least 1 inch on all sides. For rips longer than 6 inches or those near a seam, use awning fabric glue instead. Press firmly and let it cure 24 hours before retracting the awning. If the fabric around the rip is brittle or faded, replacement is the better call.
What type of glue is best for repairing awning fabric?
Look for a flexible, waterproof fabric adhesive made for vinyl or acrylic awning fabric, not a general-purpose craft glue. Awning fabric glue needs to stay flexible through heat, cold, and UV exposure so the seam does not crack. Apply a thin, even bead along the seam, press the fabric together, and weight it down for the full cure time listed on the label. Most adhesives need 24 hours before the awning goes back out in the sun.
Can I replace awning fabric myself?
Yes, if you have a helper, a sturdy ladder, and patience. Replacing retractable awning fabric means removing the roller end caps, sliding the old fabric out of the roller and frame channels, and feeding the new fabric in the same way. Measure the roller length and the fabric width accurately before ordering. On larger awnings or anything mounted above the first floor, hiring a professional is safer and often faster.
When should awning fabric be replaced instead of repaired?
Replace when the fabric has multiple tears, widespread fading, mold that returns after cleaning, or seams that keep separating after repair. A good rule: if repairs would cover more than about 20 percent of the fabric surface, or the fabric is over 10 years old, replacement usually costs less over time. Small isolated holes and single seam failures are still worth repairing.
Small awning repairs are worth doing yourself. Big ones aren’t. The line between the two comes down to fabric condition, damage size, and whether the frame or roller is involved.
When a patch won’t cut it, A to Z Awnings & Marine Canvas can help. We build and service custom awnings for homes, restaurants, and boats, using premium Sunbrella fabrics and backing every job with a 10-year warranty on workmanship and materials. Call us today for a free estimate.