Retractable Awning Motor Repair Cost: What to Expect

Table of Contents

Last Updated: October 14, 2026

What Retractable Awning Motor Repair Cost Actually Covers

A retractable awning motor repair cost is the total you pay to diagnose, remove, fix or replace, and reinstall the motor that drives your awning. At A to Z Awnings & Marine Canvas, we break every quote into four lines: service call, diagnostic time, parts, and labor to reinstall and retest.

Most homeowners assume the motor is the whole bill. It usually isn’t, on some jobs it is the smallest line item.

Here is what typically lands on a motor repair invoice:

  • Service call or trip charge: a flat fee to get a technician to your property
  • Diagnostic fee: time spent tracing the fault through the motor, wiring, switch, and remote
  • Parts: motor, limit switches, capacitor, control board, or a replacement remote
Key Takeaway
Ask any contractor to quote those five lines separately. A single lump-sum number hides whether you are paying for a $40 part or a full motor assembly, and it makes it impossible to compare two bids fairly.

Two quotes for the same symptom can differ by hundreds of dollars purely because one itemizes the diagnostic fee and the other folds it into labor. Neither is wrong, you just need to see the structure before you decide.

Awning Motor Repair Costs by Failure Type

The failure type drives price more than the awning brand does. A dead remote and a seized motor sit at opposite ends of the range; here is how the categories break down.
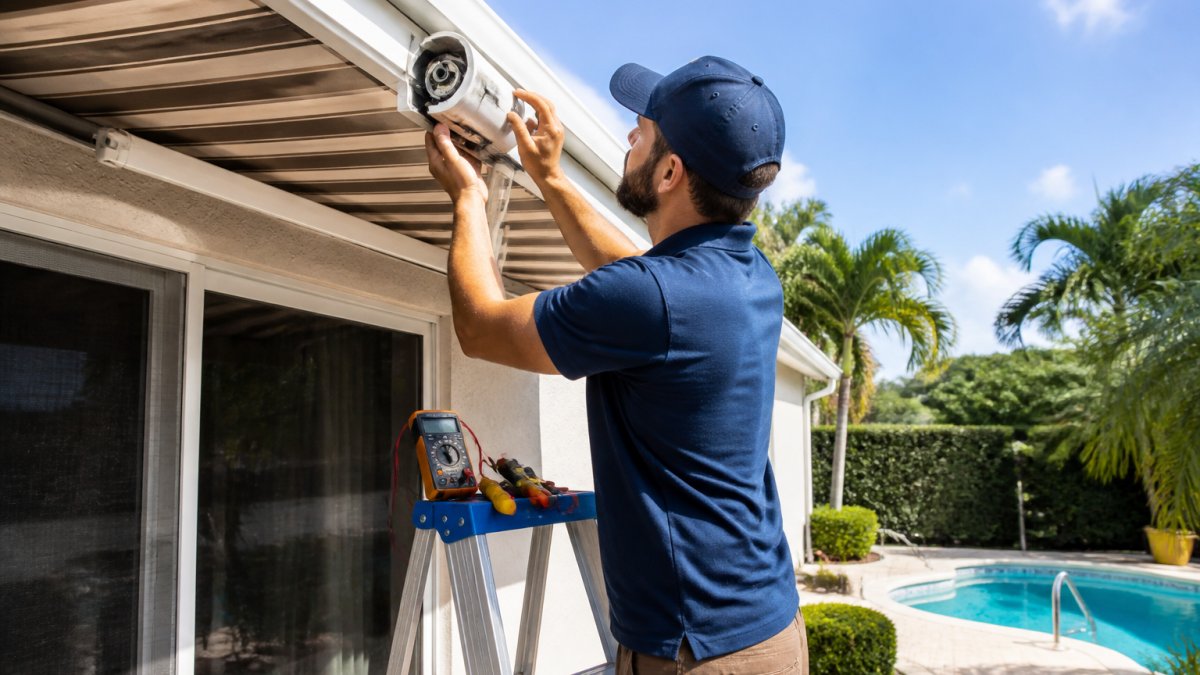
A technician on a ladder inspecting the motor housing of a retractable patio awning, tools and a multimeter nearby, bright sunny residential backyard setting

Low-Cost Faults: Controls, Power, and Remotes

These repairs look like motor failure and aren’t, and they are the most common reason a homeowner calls for a replacement that never happens.

  • Dead remote or receiver: a replacement remote or a re-pairing procedure, usually the cheapest line on any invoice
  • Tripped GFCI or blown fuse on the dedicated awning circuit: a reset, not a repair
  • Loose or corroded wiring at the motor connection or wall switch: a re-termination and a continuity test

A technician with a multimeter can usually isolate these at the motor head in under an hour. The parts are cheap; you are paying for diagnostic time and the trip charge.

Mid-Range Faults: Limit Switches and Control Boards

Limit switches tell the motor where to stop. When they fail, the awning overruns, stops short, or won’t stop. On many tubular motors the assembly is serviceable without replacing the motor, keeping the job mid-range.

Control boards and receivers sit in the same band. A board that no longer responds to the remote or wall switch can often be swapped as a module, but availability varies by brand and age.

High-Cost Faults: Burnt Windings and Stripped Gearboxes

True motor failure is the expensive category. The signs are consistent:

  • Burnt or shorted windings: the motor is silent, trips the breaker, or smells hot; it will not run under any control input
  • Stripped gearbox: the motor spins and you can hear it, but the tube does not turn, or it turns only under no load
  • Seized bearings or a bent output shaft: usually the result of a wind event or a jammed arm that was run anyway

When the motor itself fails, you are paying for a motor assembly, not a component. That line item pushes a repair into the same territory as a new awning, which is why the repair-versus-replace decision matters most here.

How Motor Type and Awning Size Move the Number

Two awnings with the identical symptom can quote differently because the motor inside them is not the same class of part.

Motor configuration Where it is used What it does to the estimate
Tubular motor Most residential retractables; motor sits inside the roller tube Common and widely stocked; replacement is a known procedure
Gear motor Larger residential and light commercial units Higher torque, heavier housing, longer removal and reinstall
Integrated motor-and-tube unit Some premium and older models Motor and tube are replaced together, so the part cost is higher
Manual crank or gearbox Non-motorized awnings No motor to replace; the repair scope is entirely mechanical

Awning size feeds torque requirements: a wider, heavier awning needs a higher-torque motor, which costs more and is less likely to be on a service van. RV motors are smaller, more specialized, and sourced through RV parts channels, changing both price and lead time.

Key Takeaway
Ask for the failure category in writing, control, limit switch, control board, or motor, before you approve any work. The category, not the brand, is what determines whether you are looking at a component swap or a motor assembly.

When Fabric and Frame Damage Rides Along

A stalled motor is often a symptom, not the disease. A jammed arm, bent pivot, or shrunken fabric binding in the track will stall a healthy motor and make it look faulty, and if the technician replaces the motor without fixing the bind, the new motor fails the same way.

A competent diagnosis checks the fabric path and arms before condemning the motor. If you have fabric damage and a motor fault, get both assessed in one visit, a second service call for something visible on the first trip is money wasted.

Retractable Awning Motor Troubleshooting: Symptoms Before You Call

Retractable awning motor troubleshooting starts with three questions: does it respond to the remote, does it move in both directions, and does it stop where it should? Your answers narrow the fault before anyone gets on a ladder.

Run this sequence before you book a service call:

  1. Test the remote. Replace the battery, then try a second remote if you have one. A dead remote mimics a dead motor.
  2. Check the power. Confirm the breaker and any GFCI outlet on the awning circuit are not tripped.
  3. Listen at the motor head. A hum with no movement points to a capacitor or a jammed tube. Silence points to power or control.
  4. Try the wall switch. If the wall switch works but the remote doesn’t, the receiver is the problem, not the motor.
  5. Watch the retract cycle. An awning that stops short or overruns has a limit switch issue.
  6. Inspect the fabric and arms. A jammed arm can stall a healthy motor and make it look faulty.
Watch Out
Do not keep pressing the button when the awning is stuck. Holding a stalled motor under load overheats the windings and can turn a cheap limit-switch repair into a full motor replacement.

If steps one through six don’t resolve it, you are looking at a motor or control-board fault, and that is a technician’s job.

Awning Motor Replacement: When Repair No Longer Makes Sense

The decision rule is simple: repair when the fault is a component, replace when the motor itself is the failure. A capacitor, a limit switch, or a remote costs a fraction of a new motor and restores full function.

A common industry guideline is the 50% rule: if the repair quote approaches half the cost of a new motor or a new awning, replacement is usually the better long-term spend. Angi’s retractable awning cost guide outlines this threshold alongside common repair categories, and it holds up in practice.

Age matters too. A motor that has run for a decade or more has already delivered its service life. Repairing it buys time, not reliability, and you may be back on the phone within a season.

Pro Tip
Ask the technician to test the motor under load after any repair, not just at the bench. A motor that spins freely off the awning can still stall once it is fighting the weight of the fabric and arms.

Retractable Awning Motor Replacement Cost: What Changes the Number

Awning motor replacement cost varies more than most owners expect, but the variables are predictable. Here is the breakdown that matters, followed by the factors that move each line.

The Four Lines on a Motor Repair Invoice

Every motor repair quote, repair or replacement, resolves into the same four lines. Ask for them separately to compare bids on equal footing.

Call us today for a free estimate →

Line item What it covers What moves it
Service call / trip charge Flat fee to get a technician to your property Distance, market, whether the fee is waived if you approve the work
Diagnostic fee Time tracing the fault through motor, wiring, switch, and remote Whether it is folded into labor or billed separately
Parts Motor, limit switches, capacitor, control board, or remote Motor type, torque rating, brand availability, warranty status
Labor Removal, bench repair or swap, reinstall, and a full retract-and-extend test Access, mounting height, whether the tube must come down

Two quotes for the same symptom can differ by hundreds of dollars purely because one itemizes the diagnostic and the other folds it into labor. Neither structure is wrong. You just need to see it before you decide.

What Warranty Coverage Actually Pays For

Warranty status is the biggest swing factor on a motor repair bill, and the one owners understand least.

  • Parts-only coverage is the most common structure. The manufacturer supplies the motor, and you pay the labor to remove, install, and retest it. On a job where the motor is the expensive line, this is a large saving; on a job where labor dominates, it is a smaller one.
  • Parts-and-labor coverage exists on some premium and extended warranties. Read the exclusions: many exclude service-call and diagnostic fees even when they cover the repair itself.
  • Voided coverage is the risk to watch. Most manufacturers void the motor and workmanship warranty if the unit has been opened or modified by anyone other than a qualified technician. A DIY attempt to save a service call can cost you the entire warranty.

Before you approve any work, ask two questions: is the motor still under warranty, and does the warranty cover labor or parts only? The answer can change the out-of-pocket number more than the choice of contractor does.

Service-Call Fees, Minimum Labor, and Regional Variation

Three charges catch owners off guard, and none is a markup.

  • Service-call fee: charged whether or not the technician can fix the unit on the first visit. Some contractors waive it if you approve the repair; many do not.
  • Minimum labor charge: most shops bill a minimum, often one hour, even when the fix takes fifteen minutes. This is standard in the trades and worth confirming up front.
  • Regional labor variation: the same job quotes differently across markets because hourly rates and travel distances differ. A dense metro market and a rural service area can produce materially different totals for identical work.

None of these are fake, they reflect travel time, insurance, and local rates. Ask each contractor to state them explicitly so the comparison is honest.

Repair Versus Replace: The Decision Rule

The decision rule is simple: repair when the fault is a component, replace when the motor itself is the failure. A capacitor, a limit switch, or a remote costs a fraction of a new motor and restores full function.

A common industry guideline is the 50% rule: if the repair quote approaches half the cost of a new motor or a new awning, replacement is usually the better long-term spend. Angi’s retractable awning cost guide outlines this threshold alongside common repair categories, and it holds up in practice.

Age matters too. A motor that has run for a decade or more has already delivered its service life. Repairing it buys time, not reliability, and you may be back on the phone within a season.

Long-Term Ownership: What Prevention Saves

Motor repair is often a maintenance failure, not a manufacturing one. The recurring costs are the avoidable ones.

  • Weather exposure: motors on awnings left extended in wind and rain take on water and grit. Retracting in weather is the cheapest maintenance there is.
  • Debris in the arms and track: leaves and twigs bind the fabric path and force the motor to work harder than it was rated for.
  • Skipped lubrication: pivot points and the fabric path need periodic lubrication per the manufacturer’s instructions.

Service life varies by motor class and exposure, but the pattern holds: a motor retracted in weather, kept clear of debris, and never run while stalled reaches the upper end of its range. Prevention is the line item that never appears on an invoice.

DIY Repair vs. Professional Service: What You Can and Should Not Do

DIY repair makes sense for exactly three things: replacing a remote battery, resetting a tripped breaker or GFCI, and clearing debris from the arms and track. Everything past that involves 120-volt wiring, a spring-loaded roller tube, or a motor under tension, none safe to open without training.

What you can safely handle:

  • Replacing remote batteries and re-pairing a remote to the receiver
  • Resetting the breaker or GFCI on the awning circuit
  • Clearing leaves, twigs, and grit from the arms and the fabric path

What you should not attempt:

  • Opening the motor housing or the control box
  • Working on the 120-volt supply, wiring, or switch
  • Releasing or adjusting the roller tube spring
Watch Out
A retractable awning roller tube stores significant spring tension. Releasing it without the proper tools and procedure can cause serious injury and will void most warranties. This is the single most common DIY mistake we see.

There is a warranty angle too. Most manufacturers, including the coverage we provide at A to Z Awnings & Marine Canvas, void the motor and workmanship warranty if the unit is opened or modified by anyone other than a qualified technician. Saving a service call can cost you the entire warranty.

Conclusion: Getting a Real Number for Your Awning

No one can give a firm number without seeing the awning, testing the motor, and identifying the fault. What you can do is insist on a quote that separates the service call, diagnostic, parts, and labor, so you can compare bids on equal footing.

That is how we quote every motor repair at A to Z Awnings & Marine Canvas. We manufacture and service custom residential, commercial, and marine shading systems, we work with hundreds of Sunbrella fabrics, and every custom-made solution we deliver carries a 10-year warranty on both workmanship and materials.

Call us today for a free estimate.

Frequently Asked Questions

How much does it cost to repair a retractable awning motor?

Your actual awning motor repair cost depends on the make, model, awning size, and whether the issue is the motor itself, the wiring, or a remote control. Call A to Z Awnings & Marine Canvas for a free estimate on your specific setup.

Is it cheaper to repair or replace an awning motor?

It depends on the fault. A failed switch, remote, or loose connection is usually a small repair. A burnt-out motor on an older awning is often better replaced. If the repair costs more than half of a new motor or awning, replacement usually makes more sense. Compare the repair estimate against a full awning motor replacement cost before deciding, and factor in the age of the fabric and frame.

How do I know if my retractable awning motor has failed?

Common signs include the awning not retracting at all, moving in one direction only, stopping halfway, or making grinding noises. A non-retracting awning is a frequent sign of motor trouble. Before assuming the motor is dead, check the power supply, the switch, the remote batteries, and any sensor. Retractable awning motor troubleshooting starts with those simple checks, because a tripped breaker or dead remote can look exactly like a failed motor.

Can I manually retract an awning if the motor stops working?

Many motorized awnings have a manual override, often a crank or a strap, that lets you retract the awning when the motor fails. Check your owner’s manual for the override location, since it varies by model. If your awning has no override and the motor is stuck, do not force the arms. Call a technician. Forcing a retracting mechanism can bend the arms or strip the chain, turning a motor repair into a full frame replacement.

Does an awning warranty cover motor repairs?

Coverage varies by brand and by what failed. Many motor warranties cover defects in the motor itself but exclude damage from power surges, storms, or improper installation. A to Z Awnings & Marine Canvas backs its custom work with a 10-year warranty on workmanship and a 10-year warranty on Sunbrella material, so it pays to check what your specific warranty covers before you authorize a repair. Keep your purchase paperwork handy when you call.
How to Reduce Cooling Costs with Awnings: 2026 Guide

Table of Contents

Last Updated: October 12, 2026

How Awnings Reduce Cooling Costs: The Basics

Awnings reduce cooling costs by blocking direct sunlight before it hits window glass, which cuts solar heat gain and lowers the load on your air conditioning. At A to Z Awnings & Marine Canvas, we make custom exterior shading for homes, restaurants, and boats across Broward and Palm Beach counties.

The science is simple. Sunlight hits a window, the glass heats up, and that heat radiates into the room. An awning interrupts that path.

Solar heat gain is the amount of heat a window lets into a building from sunlight. Block the sun, and you block the heat.

That is why a shaded window stays cooler than a bare one, even on the hottest afternoon.

Key Takeaway
Awnings work on the outside of the glass. Interior blinds and curtains only trap heat that has already entered, so exterior shading always wins.

Window Awnings for Energy Savings: What the Numbers Show

Window awnings for energy savings work best on the windows that catch the most direct sun. South-facing and west-facing windows take the hardest hit in summer, so shading them first gives you the biggest return.

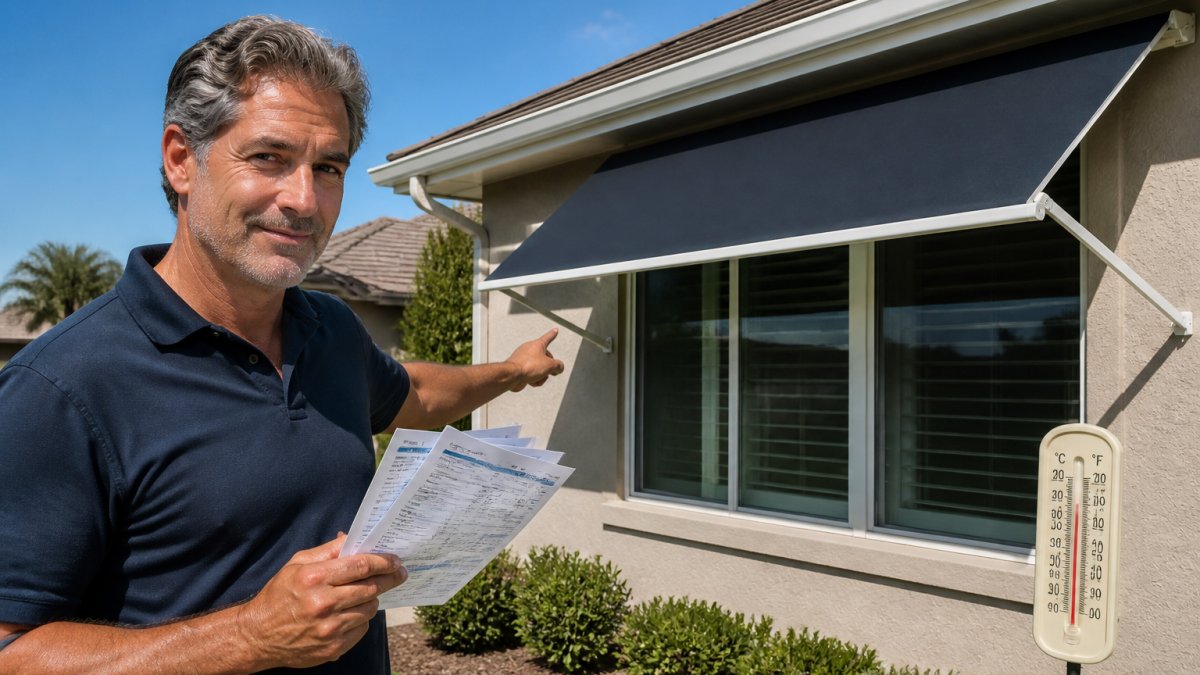
Infographic showing how window awnings reduce cooling costs by lowering indoor temperatures during sunny days.

Most articles stop at “awnings save energy” and never show you how to put a number on it. Here is a method you can run yourself, plus the assumptions that make or break the result.

Why the Headline Percentages You See Online Are Unreliable

You will find claims that awnings cut cooling costs by 20%, 25%, or more. Those figures usually come from a single climate, a single window orientation, and a best-case shade condition.

The U.S. Department of Energy notes that awnings can reduce heat gain on south-facing windows, which lowers cooling demand in warm months. You can read the details at U.S. Department of Energy guidance on awnings and shading.

A Simple Way to Estimate Your Own Savings

You do not need an energy audit to get a rough figure. You need four inputs:

  1. Your summer cooling spend. Pull two or three July and August electric bills and average them. That is your baseline.
  2. The share of cooling load from your hottest windows. South and west windows typically drive the largest share. If most of your living space faces those directions, your shaded-window share is high.
  3. How much sun the awning actually blocks. A properly sized awning on a south window can block most of the midday summer sun. A shallow awning on the same window blocks far less.
  4. How many hours a day it is deployed. A fixed awning shades all day. A retractable one shades only when you extend it.

Multiply your baseline cooling spend by the share of load from shaded windows, then apply a conservative reduction factor. If you shade your two hottest windows and they drive roughly a third of your cooling load, a 15-25% reduction on that portion is a reasonable planning range. On a $200 summer bill, that is a few dollars a month per window, modest, but real, and it compounds across a season.

Pro Tip
Run the estimate before and after installation using the same billing cycle. Actual before-and-after bills beat any online calculator, because they capture your home, your habits, and your utility’s rate structure.

What Moves the Number Up or Down

  • Window orientation: South and west windows gain the most heat, so they offer the most savings.
  • Awning coverage and projection: More shade on the glass means less heat, up to the point where you block light you want.
  • Fabric and color: Darker, tighter weaves block more sun; lighter fabrics reflect more but transmit more.
  • Deployment habits: A retractable awning used only during peak hours still captures most of the benefit.
  • Glazing: Single-pane windows gain more heat than double-pane, so they benefit more from shading.
  • Climate and cooling season length: Longer, hotter summers mean more savings; mild summers mean less.

The Heating Trade-Off Nobody Mentions

Shade that helps in July can hurt in January. If you heat your home in winter, a fixed awning that blocks low winter sun on a south window adds to your heating load.

A common approach is to start with your hottest windows, measure your energy bills before and after, and let your own utility data, not a generic percentage, tell you what the awning is worth.

Awning Placement for Sun Protection: Orientation, Sizing, and Climate

Awning placement for sun protection comes down to three things: which way the window faces, how far the awning projects, and how high the sun sits in summer.

Projection is how far the awning reaches out from the wall. A deeper projection casts more shade, but too much can block winter sun you actually want.

Use this quick guide:

Window Direction Sun Intensity Recommended Projection Best For
South-facing High Medium to deep All-day summer shade
West-facing Very high Deep Afternoon heat relief
East-facing Moderate Shallow to medium Morning sun block
North-facing Low Minimal Light glare only

For most homes, we recommend shading south and west windows first. Those are the ones that push your indoor temperature up and keep your AC working overtime.

Climate and Seasonal Limitations

Awnings help most in hot, sunny climates with long summers. In cooler months, you may want more sun, not less. That is where a retractable awning earns its keep: extend it in July, roll it back in January.

One honest limitation: a fixed awning cannot adjust. If your climate swings between hot summers and cold winters, a retractable model gives you control.

Watch Out
Skipping a wind check is the most common mistake. A fully extended awning in a sudden storm can tear fabric or bend hardware. Always retract when high winds are forecast.

Best Awning Fabric for Heat Reduction: Materials and Colors

The best awning fabric for heat reduction blocks sunlight before it passes through. Two factors matter most: the weave and the color. But the fabric you choose also decides how long the awning lasts, how often you clean it, and how it handles sun, rain, and salt air. Here is how the common options compare.

Call us today for a free estimate →

Fabric Options and What They Trade Off

  • Solution-dyed acrylic. The most common choice for residential and commercial awnings. Color is built into the fiber rather than applied on top, so it resists fading and holds up under strong sun. It breathes, which helps in humid climates, and cleans with mild soap and water. It is also the priciest of the common options. Sunbrella is the best-known brand in this category, and it comes in hundreds of colors and patterns.
  • Solution-dyed polyester. Similar fade resistance to acrylic at a lower price point. It is often a bit less breathable and can feel stiffer, but for many homeowners it is a solid middle ground.
  • Vinyl-coated or laminated fabrics. Highly water-resistant and easy to wipe down, which suits coastal and commercial use. The trade-off is heat: vinyl does not breathe, so it can trap warmth and feel hotter underneath, and it may not block radiant heat as well as a tight acrylic weave.
  • Canvas and cotton blends. Traditional look, but they fade, mildew, and stretch faster than synthetics. Best reserved for covered or low-sun applications.
  • Mesh and shade fabrics. Good for patios and glare control, but they block less direct sun than a solid awning fabric, so they are a weaker choice for cooling-focused window shading.

Color and Weave: The Heat Math

Color matters more than most people think:

  • Dark colors block more light and cast deeper shade, but they absorb heat and can run hotter to the touch.
  • Light colors reflect more heat but let some light through, so the shade underneath is less deep.
  • Tight weaves block more sun than loose ones, regardless of color.

For pure heat blocking on a window, a dark, tightly woven fabric usually wins. For a patio where people sit underneath, a lighter fabric that reflects heat can feel more comfortable even if it blocks slightly less sun. Match the fabric to the job.

Maintenance and Durability Trade-Offs

Every fabric has trade-offs. Darker fabrics show dust and pollen more. Light fabrics may need more cleaning to stay bright. Vinyl wipes clean easily but can crack over time in strong sun. Acrylic resists fading but still needs seasonal care. Salt air near the coast can wear on stitching and hardware regardless of fabric, so coastal homes should plan on regular checks.

A simple routine keeps fabric in shape:

  • Rinse with mild soap and water each season.
  • Brush off pollen and debris.
  • Check seams and stitching twice a year.
  • Retract during storms.
Watch Out
Do not pressure-wash awning fabric. High pressure drives water into seams and can strip coatings, shortening the life of the awning.

How to Choose

Start with where the awning will live. A window awning in a hot, dry climate points toward a tight, dark acrylic. A coastal patio awning that sees salt spray and rain points toward a solution-dyed fabric with corrosion-resistant hardware. A restaurant that needs a specific look may trade a little heat performance for a color or pattern that fits the brand.

Retractable Awnings and Energy Efficiency: Flexible Shade Control

Retractable awnings and energy efficiency pair well because you control the shade. A fixed awning is always out.

That flexibility matters in a place with strong summer heat and mild winters. You get shade in July and sun in January, from the same awning.

For restaurants and outdoor dining, retractable awnings do double duty. They shade guests during the day and roll away for evening service or events.

Installation, Costs, and Payback for Awnings

Professional installation is the step most guides skip, and it is the one that decides whether your awning lasts.

Here is how the process usually goes:

  1. Measure and assess. We check window size, wall type, and sun exposure.
  2. Choose fabric and style. You pick from hundreds of Sunbrella options.
  3. Fabricate the awning. Each piece is custom-made to your measurements.
  4. Install the hardware. Mounting must handle wind and weight.
  5. Test and adjust. We check the retract mechanism and fit.
  6. Set a care routine. You get simple cleaning and use tips.

Sizing and placement matter as much as the install. A well-placed awning on a south-facing window does more than a bigger awning on a shaded one.

On cost and payback: pricing depends on size, fabric, and whether the awning is fixed or retractable.

Pro Tip
Ask about orientation before you pick a fabric. A deep awning on a west window often saves more energy than a fancy fabric on a north one.

Conclusion: Making Awnings Work for Your Cooling Costs

Cutting cooling costs is not about one trick. It is about blocking the sun before it turns into heat inside your home. Awnings do that better than almost any interior fix, and they make your outdoor space more usable at the same time.

At A to Z Awnings & Marine Canvas, we build custom awnings for homes, restaurants, and boats, using hundreds of Sunbrella fabrics and backing every job with a 10-year warranty on workmanship and materials.

Frequently Asked Questions

How do awnings help reduce cooling costs?

Awnings block direct sunlight from hitting windows and walls, which lowers solar heat gain. By stopping that heat before it enters, your air conditioner runs less often and uses less energy. On south-facing windows, exterior shading like awnings can cut heat gain substantially, leading to lower indoor temperatures and reduced cooling demand. This translates into lower energy bills, especially during summer months when AC workload peaks.

How much can awnings reduce air-conditioning use?

Studies on exterior shading show that awnings can reduce cooling energy consumption in some homes, depending on climate, window orientation, and awning type. In hotter regions, the percentage reduction may be higher for west- or south-facing windows. Actual savings vary with your home’s insulation, AC efficiency, and how often the awning is deployed. Retractable awnings allow you to extend shade only when needed, maximizing efficiency.

Where should awnings be installed to block the most heat?

Install awnings on south-facing windows first, as they receive the most direct sunlight throughout the day. West-facing windows are also critical because afternoon sun is intense and can significantly raise indoor temperatures. For doors and outdoor living spaces, awnings on the west and south sides provide the greatest comfort. Proper projection and side flaps can further improve performance by blocking low-angle sun.

Which awning fabric is best for reducing heat?

Acrylic fabrics like Sunbrella are a top choice for heat reduction because they are tightly woven, breathable, and block a high percentage of UV rays. Lighter colors reflect more sunlight and stay cooler, while darker colors absorb heat but may offer better glare control. The fabric’s weave and weight also matter: heavier fabrics provide more insulation. For maximum heat reduction, choose a light-colored, tightly woven acrylic fabric.

Marine Canvas vs Vinyl Enclosures: Complete Comparison

Table of Contents

Last Updated: October 11, 2026

Marine Canvas vs Vinyl Enclosures: Key Differences

Choosing between marine canvas vs vinyl enclosures depends on your priorities: visibility, durability, weather protection, or maintenance ease. Both protect your vessel, but they excel in different situations. Here’s what separates them.

Both shield your boat’s interior from sun, rain, and salt spray, but material properties, aging, and maintenance demands differ significantly.

Material Properties and Construction

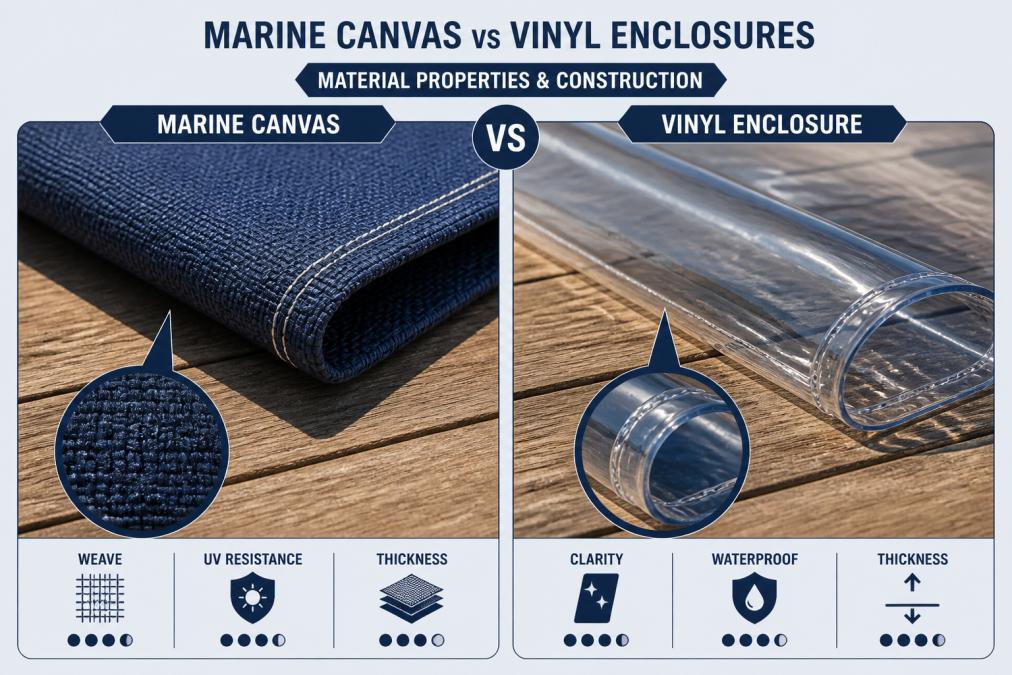
Marine canvas typically uses 100% acrylic fabrics like Sunbrella Marine Fabric, which combines breathability with water resistance. The acrylic construction resists UV degradation and holds color well over time. Vinyl-coated alternatives, such as Stamoid and Top Gun coated polyester, prioritize maximum waterproofness by layering vinyl over fabric backing. Clear vinyl, commonly 40-gauge, offers transparency but trades some durability for visibility.

Close-up of marine canvas fabric weave texture and clear vinyl material samples displayed side by side on wooden surface, showing distinct material differences under natural sunlight

Acrylic and Polyester Canvas

Sunbrella Marine Fabric’s 100% acrylic construction allows air circulation, reducing condensation and mildew risk. Top Gun coated polyester prioritizes abrasion resistance, valuable if your enclosure contacts rigging or rough handling.

Clear Vinyl and Vinyl-Coated Fabrics

Clear vinyl provides unobstructed visibility and remains flexible, but clouds over time from UV exposure. Vinyl-coated fabrics like Stamoid seal out moisture completely but are less breathable, trapping condensation during temperature swings.

Weather Protection and Waterproofness

Acrylic canvas resists water through tight weave density; vinyl-coated materials create a physical barrier on top. Both rely on properly sealed seams for reliable protection during heavy rain or saltwater spray.

Both fail fastest at seams and zippers. Professional installation and annual seam inspection extend the life of either option significantly.

Visibility and Optical Clarity in Clear Vinyl Boat Enclosure Panels

Clear vinyl panels deliver immediate visibility for navigation and views. The 40-gauge thickness balances flexibility with integrity. However, UV exposure causes cloudiness within 3-5 years, requiring replacement rather than repair.

Acrylic canvas offers no visibility but accepts separate clear vinyl window panels, letting you choose visibility where needed while maintaining durability.

Marine-Grade Canvas Waterproof Performance and Durability

Marine canvas with proper sealing delivers waterproof performance comparable to vinyl-coated alternatives. The key advantage is breathability: acrylic canvas allows moisture vapor to escape, reducing condensation in humid climates or temperature swings.

UV Resistance and Service Life

Sunbrella Marine Fabric resists UV degradation and maintains appearance for 7-10+ years. Vinyl-coated fabrics resist UV well but can become brittle with age. Clear vinyl clouds within 3-5 years.

Saltwater and Oil Resistance

Acrylic canvas resists saltwater corrosion naturally but can stain from heavy grease or fuel. Vinyl-coated materials repel both saltwater and oils effectively, ideal for high-salt environments, but can crack or peel in cold conditions.

Marine Canvas and Vinyl Maintenance and Care

Canvas enclosures require regular cleaning with mild soap and fresh water to prevent mildew and salt buildup. Avoid pressure washers. Inspect seams annually and reseal if cracks appear.

Vinyl-coated enclosures tolerate harsher cleaning but require UV protection when idle. Clear vinyl clouds from installation onward; UV covers are the only prevention strategy.

Maintenance Task Marine Canvas Vinyl-Coated Clear Vinyl
Routine Cleaning Mild soap, fresh water Mild soap or stronger cleaners Mild soap only
Seam Inspection Annual Annual Annual
Resealing Every 2-3 years Every 3-5 years Every 2-3 years
UV Protection Moderate (acrylic resists well) Good Poor (clouds over time)
Condensation Risk Low (breathable) High (sealed) Moderate

Custom Boat Canvas Enclosure Selection and Installation

Choosing the right enclosure material requires matching properties to your climate, boating season, and use case.

Climate-Based Material Selection

High-UV and sunny climates (Southwest, South, Southeast): Acrylic marine canvas with Sunbrella fabric is the strongest choice. Clear vinyl clouds within 2-3 years in intense sun.

Humid and coastal/saltwater environments (Atlantic Coast, Gulf Coast, Great Lakes): Vinyl-coated fabrics like Stamoid excel here. Acrylic canvas also performs well with annual seam inspection, offering reduced condensation. Avoid clear vinyl unless you replace it every 3-4 years.

Cold climates (Northern regions, Great Lakes, Northeast): Acrylic marine canvas is the most reliable choice. Vinyl-coated materials crack or peel during freeze-thaw cycles. Canvas remains flexible and reduces interior condensation during temperature swings.

Moderate, variable climates (Mid-Atlantic, Midwest, Pacific Northwest): Both perform adequately. Canvas requires more hands-on care but offers better breathability and lower long-term cost. Vinyl-coated materials demand less maintenance but cost more upfront.

Seasonal vs. Year-Round Use

Seasonal boats (spring through fall storage): Clear vinyl becomes practical because you can replace it before the next season. Vinyl-coated materials also work well with minimal off-season maintenance.

Year-round boats: Acrylic marine canvas is the most economical choice over time. Clear vinyl is not recommended unless you plan to replace it every 3-4 years.

Condensation, Ventilation, and Interior Comfort

One overlooked trade-off is breathability and its effect on interior comfort, critical in enclosed spaces like flybridge enclosures or fishing boat cabins.

Acrylic marine canvas is breathable. Moisture vapor passes through the weave, preventing condensation pooling and reducing mildew, mold, and equipment corrosion, a significant advantage in humid climates or variable temperatures.

Vinyl-coated fabrics and clear vinyl are non-breathable. They trap humidity inside, causing condensation on cool mornings or when idle. This can drip onto upholstery and equipment, accelerating corrosion. Mitigate with active ventilation: open windows, use dehumidifiers, or install ventilation ports.

For boats in humid climates or those that sit idle frequently, acrylic canvas’s breathability is a significant advantage. For boats in dry climates or continuous use, vinyl’s non-breathable nature is less problematic.

Call us today for a free estimate →

Material Compatibility and Hybrid Enclosures

Many boat owners combine materials strategically: canvas main enclosure with clear vinyl windows for durability and visibility; vinyl-coated fabric with canvas reinforcement in high-wear areas; or removable clear vinyl panels for seasonal replacement.

When combining materials, ensure seams are properly sealed and transitions are reinforced. Incompatible materials can create stress points where water ingress occurs.

Installation Details and Frame Fit

Precise measurement is non-negotiable. Even quarter-inch errors compound across seams, creating gaps that compromise weather protection. Request a professional site visit to verify dimensions.

Proper tension is critical during installation. Material must be stretched evenly to shed water; loose panels trap water, over-tensioned panels tear. Experienced installers achieve consistent tension and seal seams with marine-grade sealant.

Use stainless steel fasteners for saltwater resistance. Double-stitch seams with UV-resistant thread and seal with marine-grade polyurethane or silicone. Lubricate marine-grade zippers regularly with silicone spray.

Pro Tip
Measure twice, order once. Request a site visit from your enclosure provider to verify dimensions in person. Take photos of the frame from multiple angles and note any obstacles. This investment in accuracy prevents costly errors and ensures proper fit.

Warranty and Professional Installation

Reputable providers offer warranties on Sunbrella materials and workmanship, covering seam failure, material degradation, and UV issues but excluding improper maintenance, accident, or extreme weather.

Professional installation is worth the cost. Experienced installers achieve proper tension, seal seams correctly, and ensure long-term performance, the difference between 5-year and 10+ year enclosures.

Lifecycle Cost and Repairability

Purchase price alone masks true cost of ownership. A lifecycle analysis includes initial cost, maintenance, repairs, and replacement, each varying by material and climate.

Initial Purchase and Installation

Acrylic canvas costs less upfront than vinyl-coated alternatives; clear vinyl is lowest initially but erodes quickly with maintenance and replacement. Professional installation is worth the investment regardless of material choice.

Maintenance and Repair Costs Over Time

Acrylic canvas requires annual seam inspection and resealing every 2-3 years. Small tears patch. Mildew prevention is low-cost owner maintenance.

Vinyl-coated materials require less frequent seam maintenance (every 3-5 years) and tolerate harsher cleaning methods, reducing labor costs. However, vinyl-coated enclosures cannot be easily patched if the coating tears; the repair often requires replacing an entire panel section. Clear vinyl sits between these extremes: inexpensive to maintain initially, but once cloudiness appears (typically 3-5 years), no cleaning or treatment restores clarity. Replacement becomes the only option.

Replacement and End-of-Life Costs

A well-maintained acrylic marine canvas enclosure remains serviceable for 10-12 years or longer. When replacement finally becomes necessary, the material itself is recyclable, and removal costs are minimal. Total lifecycle cost for a canvas enclosure over 12 years typically includes installation, maintenance, and minor repairs.

Vinyl-coated enclosures often last 8-10 years with proper care, requiring full replacement sooner than canvas. Replacement cost mirrors the original installation, so a second enclosure over a 15-year boat ownership period adds significant expense. Clear vinyl enclosures, despite lower initial cost, often require replacement twice in the same timeframe, at 5 years and again at 10 years, making total lifecycle cost comparable to or higher than canvas, despite the lower per-unit price.

Repairability and Panel Replacement

Canvas and vinyl-coated materials both accept patches, though visibility and longevity differ. A canvas patch blends reasonably well with the surrounding fabric, especially if the repair uses matching Sunbrella material. Vinyl-coated patches are more visible and may create a slight texture difference at the seam. Both hold reliably if applied by a professional.

Clear vinyl cannot be patched once cloudiness appears; the degradation is cosmetic but irreversible. Scratches and minor damage can be addressed with vinyl repair kits, but deep gouges or seam failures require panel replacement. Individual clear vinyl panels can be replaced, depending on size and frame configuration.

Canvas panels can be individually replaced if a section becomes damaged beyond repair, though this is rare. The modular nature of canvas enclosures makes partial replacement feasible and cost-effective. Vinyl-coated panels are similarly replaceable but at higher per-panel cost.

Climate-Adjusted Lifecycle Projections

In high-UV environments (southern and southwestern regions), acrylic marine canvas retains its appearance and structural integrity longer than vinyl-coated materials, which can become brittle. Clear vinyl clouds noticeably faster in these climates, often within 2-3 years rather than 3-5.

In humid or saltwater-heavy climates (coastal regions, Great Lakes), vinyl-coated materials resist corrosion and moisture penetration more effectively than canvas, potentially justifying higher upfront cost through reduced maintenance.

In cold climates, vinyl-coated materials can crack or peel if flexed repeatedly during freezing temperatures. Canvas remains flexible in cold and does not suffer this degradation. Owners in northern regions should factor in the reduced lifespan of vinyl-coated materials or choose canvas for year-round reliability.

Total Cost of Ownership Comparison

Over a 12-year ownership period, a typical boat owner can expect varying total costs depending on the material chosen, including installation, annual inspections, seam resealing, and potential repairs or replacements.

The true cost winner depends on your climate, how often you use the boat, and your tolerance for maintenance. Canvas favors owners willing to perform annual inspections and those in variable-temperature climates. Vinyl-coated materials suit owners in stable, high-salt environments who prefer less frequent maintenance. Clear vinyl is economical only if you replace it on schedule and accept reduced visibility as it ages.

Frequently Asked Questions

What is better for a boat enclosure, canvas or vinyl?

The choice depends on your priorities. Marine canvas offers superior durability, breathability, and a traditional appearance, with a typical service life of 10+ years when properly maintained. Clear vinyl enclosures provide excellent visibility and waterproofness but may cloud over time and offer less breathability. Canvas works better in humid climates where condensation is a concern; vinyl excels when maximum water protection is the priority. Many boat owners combine both, using canvas panels with clear vinyl windows for balanced performance.

Is marine-grade canvas waterproof?

Marine-grade canvas is water-resistant, not fully waterproof. Quality marine canvas fabrics like Sunbrella use acrylic or coated polyester construction that sheds water effectively and dries quickly, but water can penetrate the weave over time under sustained pressure. Vinyl-coated canvas (like Stamoid) offers maximum waterproofness by design. For complete waterproofing, clear vinyl or vinyl-coated materials are better choices. Proper sealing of seams and regular maintenance significantly improve canvas water resistance.

How long do clear vinyl boat enclosures last?

Clear vinyl typically lasts 5-7 years before optical clarity degrades from UV exposure and weathering, though the material remains functional. High-quality 40-gauge vinyl holds its shape better than thinner grades and resists yellowing longer. Lifespan varies by sun exposure, climate, and maintenance. Marine canvas generally outlasts clear vinyl by 3-5 years, reaching 10+ years with proper care. UV-protective treatments and keeping vinyl covered when not in use can extend service life significantly.

Can canvas and clear vinyl be combined in a boat enclosure?

Yes, combining canvas and clear vinyl is a practical and popular approach. Use durable marine canvas for side panels and rear sections, where durability and breathability matter most, and clear vinyl for front windows where visibility is essential. This hybrid design balances weather protection, condensation control, and sight lines. It also allows you to replace individual panels separately, vinyl windows can be upgraded without replacing the entire enclosure. Custom boat canvas enclosures often use this mixed-material strategy for optimal performance.

Benefits of Retractable Deck Awnings for Your Home

Table of Contents

Last Updated: October 9, 2026

Benefits of Retractable Deck Awnings: Why Homeowners Make the Switch

A retractable deck awning is a fabric canopy mounted to your home’s exterior that extends over your deck for shade and rolls back into a protective housing when you don’t need it. At A to Z Awnings & Marine Canvas, we build and service custom retractable deck awnings across Broward and Palm Beach counties, and the reasons homeowners call rarely change: too much sun, too much heat, and a deck they can’t use for half the day.

The benefits of retractable deck awnings come down to control: you decide when shade exists. Fixed structures don’t offer that choice, which is why so many homeowners switch after one season of fighting the sun.

A family relaxing on a shaded backyard deck under an extended retractable awning on a sunny day, with outdoor furniture and potted plants visible

Cooler Decks and Lower Cooling Costs

Shade works on two fronts: it cools the people under it and blocks heat before it reaches your walls. A retractable awning over west- or south-facing glass does both.

How Shade Blocks Heat Before It Reaches Your Home

Direct sunlight hitting a sliding glass door or window transfers heat straight into the room behind it. That’s why a west-facing living room turns into an oven by late afternoon. But the physics of shading exterior glass is well understood, and the U.S. Department of Energy guidance on shade and window heat gain explains how exterior shading reduces solar heat entering a home.

UV Protection for People, Pets, and Furniture

Sun exposure damages more than skin: it fades upholstery, cracks vinyl, and breaks down cushion stitching. A retractable awning creates a physical barrier between your deck and direct sunlight while extended.

For people and pets, that barrier matters. The U.S. Environmental Protection Agency’s UV safety guidance documents how prolonged exposure to UV rays contributes to skin damage and how shade reduces exposure during peak sun hours.

A common mistake is assuming dark awning fabric provides more UV protection than lighter fabric. In practice, construction and weave matter more than color.

Retractable Awning Pros and Cons: An Honest Look

No shade solution fits every deck. The honest trade-off:

Pros:

  • Adjustable shade you control by time of day and season
  • Rolls away for storage, so it isn’t exposed to storms year-round
  • Protects people, pets, and outdoor furniture from direct sun

Cons:

  • Costs more upfront than a basic fixed canopy
  • Requires a sound mounting surface and proper installation
  • Needs periodic cleaning and fabric care
Watch Out
The most common mistake we see is homeowners mounting a retractable unit to a surface that can’t carry the load, like a loose fence post or a rotted fascia board. The awning fails, and so does the deck attachment. Have the mounting surface checked before installation, not after.

Retractable Awning vs Fixed Awning: Which Fits Your Deck?

A fixed awning stays out permanently; a retractable one extends and rolls back on demand. That difference drives every other comparison.

Factor Retractable Awning Fixed Awning
Adjustability Extends and retracts on demand Permanent, no adjustment
Weather exposure Protected when rolled in Exposed year-round
Wind and storm risk Retracts to reduce damage Must withstand all weather
Upfront cost Higher Lower
Best for Decks used across seasons and times of day Shade needed in one spot, all the time

For a deck you use morning and evening, a retractable awning wins because the sun angle changes and you can match it. For a spot needing shade every hour, a fixed structure can make sense, though it takes the full brunt of weather with no way to move.

Retractable Awning Rain and Wind Limits: What to Know Before You Buy

A retractable awning is a fair-weather shade structure, not a roof. It handles a passing shower and light breeze but isn’t engineered to stay out through a storm; treating it like a permanent canopy is the fastest way to void a warranty and bend a frame.

What the Numbers Actually Mean

Every retractable awning has a model-specific wind limit. Common residential ratings fall around 15 to 25 mph for a fully extended unit, with heavier commercial frames rated higher.

The practical rule most installers give is simple: if you feel the awning lift, sway, or flutter, it’s already past the point where it should be out. Retract at the first sign of movement.

Why Wind, Not Sun, Kills Awnings

Fabric and frame both degrade over time, but wind causes sudden, expensive failure. When an extended awning catches a gust, load transfers through the arms, torsion bar or spring, and mounting brackets into your home’s framing.

This is why the mounting surface matters as much as the awning. A unit bolted into a solid rim joist or blocked wall stud handles load far better than one lagged into fascia board, a railing post, or a hollow wall.

Rain, Snow, and Ice

Light rain is fine; standing water is not. Awning fabric is water-resistant, not waterproof, and fabric that sags under pooling rain can stretch permanently or tear at the seams. If rain ponds on the fabric, retract the awning.

Call us today for a free estimate →

Snow and ice are a hard stop. An extended awning isn’t designed to carry snow load, and even a few inches of wet snow can exceed what the frame holds.

Retracting Discipline and Automated Help

Most awning damage is a timing problem, not a manufacturing one: the homeowner isn’t home when the afternoon storm rolls in, or wind picks up faster than expected. Two features reduce that risk:

  • Wind sensors detect movement and trigger automatic retraction. They are the single most useful add-on for a deck that sits on an open, exposed lot.
  • Sun and rain sensors extend the awning when sun is strong and retract it when rain begins, which suits a deck used unpredictably.

Sensors aren’t a substitute for judgment. They reduce forgotten retractions, but a sensor can fail, lose power, or react slower than a fast-moving front. If severe weather is forecast, retract manually and leave it in.

Watch Out
A retractable awning left out through a storm is one of the most common insurance-claim and warranty-void scenarios in the category. Check your homeowner’s policy and the awning warranty language before you assume storm damage is covered.

Matching the Awning to Your Exposure

Before you buy, assess how exposed your deck is. A deck tucked behind a privacy fence, hedge, or neighboring structure sees far less wind than one on an open corner lot or waterfront. If exposed, plan for a heavier frame, a lower wind rating you’ll respect, and a wind sensor. If sheltered, a lighter residential unit may serve you for years.

Manual vs Motorized Operation and Smart Controls

Manual awnings use a hand crank or pull strap. They cost less, have fewer parts to fail, and work fine on a smaller deck. Motorized awnings use a motor and wall switch or remote, and many connect to smart-home controls or wind and sun sensors that retract automatically. Motorized units suit large awnings, hard-to-reach mounts, and anyone who wants the awning to respond to conditions without being home.

Pro Tip
If you’re choosing between manual and motorized, think about how you’ll actually use the deck. On a small deck where you extend the awning once a day, manual is the sensible pick. On a large deck or a commercial patio where the awning moves several times a day, motorized pays for itself in convenience and in fewer forgotten retractions before a storm.

Choosing the Right Retractable Deck Awning for Your Space

Most buying guides treat a deck like a patio and skip the details that determine whether an awning works: which way the deck faces, where doors and railings sit, how the sun moves across the space, and how much of the deck you want shaded at the hours you use it. Answer those before picking a size.

Start With Orientation, Not Square Footage

Sun angle drives everything. A south-facing deck gets strong midday sun and needs a shorter projection to shade seating at noon.

Walk your deck at the hours you actually use it and note where the sun hits. A unit sized for noon shade on a west-facing deck will leave your 5 p.m. dinner table in full sun. Match projection to your peak use time, not the deck’s total width.

Projection, Width, and Real Coverage

Awning projection is the distance the fabric extends from the mounting wall; common residential projections run about 8 to 13 feet, with wider units for large openings. Width is the span along the wall.

A useful rule of thumb: a projection of about half the deck’s depth shades the near half at midday, but not the far edge. For shade over a dining table at the far rail, you need a longer projection, a freestanding or pergola-mounted unit, or a second awning on an adjacent wall.

Deck Layout Details That Change the Plan

  • Railing height and type. A solid or glass railing can block airflow and trap heat, which makes shade more valuable but also changes how the awning interacts with wind. Open metal railings let breeze through and reduce wind load on the awning.
  • Door swing and headroom. A sliding door needs clearance so the awning’s leading edge and valance do not interfere with the track or the door’s travel. A hinged door needs headroom above the swing.
  • Mounting wall condition. The wall must have solid framing or blocking behind it. Stucco, siding, and brick all require different fastening approaches, and a hollow or degraded wall needs reinforcement before installation.

Fabric, Frame, and Finish

Fabric choice affects heat, fade resistance, and appearance. Solution-dyed acrylic fabrics such as Sunbrella are engineered for UV resistance and colorfastness and hold color far better than printed or laminated fabrics (Sunbrella Fabric Difference).

Frame choice follows exposure. Standard powder-coated aluminum frames suit sheltered decks; heavier-gauge frames and stainless hardware make sense on exposed or waterfront decks where salt and wind are constant.

Ownership: Maintenance, Lifespan, and Repair

A retractable awning is a long-term purchase, and care determines how long it lasts.

  • Cleaning. Brush off debris and rinse the fabric periodically with mild soap and water. Do not scrub with abrasive cleaners or pressure-wash the fabric, which damages the weave and the finish.
  • Inspection. Check the arms, brackets, and mounting hardware each season for looseness, rust, or wear. A loose bracket caught early is a cheap fix; a failed bracket is not.
  • Seasonal care. Retract and secure the awning before storm season and before winter. Clean and dry the fabric before long storage to prevent mildew.

A Pre-Purchase Checklist

  • The mounting surface can carry the awning’s load, verified before installation
  • The projection matches the sun angles at your peak use times, not just the deck width
  • The frame and hardware suit your wind and salt exposure

A to Z Awnings & Marine Canvas manufactures and services custom residential, commercial, and marine shading solutions, and we repair existing awnings too. If you’re weighing a new retractable deck awning against fixing what you have, we’ll give you a straight answer on which makes more sense.

Frequently Asked Questions

Can you leave a retractable awning out in the rain?

Retractable awnings can handle light rain, but they are not built to stay out in heavy storms. Most manufacturers recommend retracting the awning when rain becomes steady or when wind picks up, because water can pool on the fabric and strain the frame. If you want rain coverage for a deck, look for a model with a steep pitch and water-resistant fabric, and always retract it before severe weather arrives.

Do retractable deck awnings actually keep a deck cooler?

Yes. By blocking direct sunlight before it hits the deck surface, a retractable awning can lower the temperature on your deck by a noticeable margin. The shade also reduces heat that would otherwise radiate through windows and doors, which can ease the load on your air conditioning. Homeowners often find the deck becomes usable earlier in the day and stays comfortable longer into the afternoon.

Are retractable awnings better than fixed awnings?

It depends on how you use your deck. Retractable awnings give you adjustable shade, so you can extend them when the sun is strong and retract them when you want open sky or need to protect the fabric from wind. Fixed awnings offer permanent coverage and fewer moving parts, but they cannot adapt to changing sun angles or weather. For decks that see varied use, retractable models usually offer more flexibility.

What are the main pros and cons of retractable awnings?

Pros include flexible shade control, UV protection for people and furniture, reduced heat on the deck, and the ability to retract the awning during high wind or storms. Cons include a higher upfront cost than fixed awnings, more moving parts that can wear over time, and the need to retract them during severe weather. Regular maintenance and a quality warranty help offset the long-term drawbacks.

Hoover Awnings vs Delray Awning: Which Is Better?

Table of Contents

Last Updated: October 7, 2026

Hoover Awnings vs Delray Awning: A Side-by-Side Comparison

Choosing between Hoover Awnings vs Delray Awning comes down to more than a quote.

An awning is a shade structure made from fabric stretched over a metal frame and mounted to a building or freestanding support.

Here’s why that gap exists, and how to read it before you sign anything.

A lower number usually means a lighter frame, a thinner fabric, or a shorter warranty, and those differences show up fast in South Florida sun and salt air.

Below, we walk through cost drivers, fabric durability, warranty coverage, maintenance, and how to read reviews for both companies. We also explain where a custom manufacturer fits if neither option matches your project.

Awning Installation Cost: What Drives the Price Difference

Awning installation cost depends on five things: size, fabric grade, frame material, mounting method, and whether the job needs a permit. Two quotes for the same patio can differ by thousands because each company weighs those factors differently, and because some quotes quietly leave items out.

Here’s what moves the number most:

  • Fabric grade. Entry-level canvas costs less up front but fades and weakens faster under UV exposure. Solution-dyed acrylics like Sunbrella hold color longer and typically run a meaningful step above entry-level canvas per yard.
  • Frame material. Aluminum is standard; heavier-gauge or powder-coated frames cost more and resist wind better. Retractable units add arms, a cassette, and often a motor, which is the single largest jump in a quote.
  • Mounting type. A fixed awning is cheaper to build than a retractable one with a motor and arms. Freestanding and pergola-style shade sits in a different price tier again.
  • Permits. Many jurisdictions require an awning permit, and some storefronts also need a sign permit. Fees and review time vary by city and zoning district, and the contractor’s time to pull the permit is a real line item.
  • Site conditions. Stucco, concrete, and wood each need different anchors and prep work. Second-story installs, tight access, and electrical work for a motor all add labor.

What a line-item quote should show

A quote you can actually compare breaks into these buckets. If any bucket is missing, that’s the question to ask before you sign:

  1. Materials, fabric by name and grade, frame gauge and finish, hardware and fasteners.
  2. Fabrication, cutting, sewing, thread type, and any custom patterning for odd angles.
  3. Labor, installation hours, number of installers, and any lift or scaffold rental.
  4. Permit and engineering, permit fee, plan review, and any wind-load or engineering documentation required by the jurisdiction.
  5. Electrical, motor, wiring, switch or remote, and whether an electrician is subcontracted.
  6. Warranty terms, what’s covered, for how long, and who pays labor on a claim.

Why we don’t publish a price list

Pricing depends on fabric selection, frame specifications, and site conditions. Ask every contractor for a line-item quote that separates materials, labor, hardware, and permit fees. A single lump-sum number hides where the savings come from.

A practical way to compare is to request the same scope from each bidder, same dimensions, same fabric family, same mounting type, same permit handling, and then compare the line items side by side. When the scopes match, the price gap tells you something real about materials and labor. When the scopes don’t match, the price gap is mostly noise.

Watch Out
A quote that undercuts the others by a wide margin usually skips something: permit handling, upgraded anchors, or a real warranty. Ask which line item was cut before you celebrate the savings.
Key Takeaway
The most useful question in a quote review isn’t “what’s the total?”, it’s “what’s not in this total?” Get the exclusions in writing before you compare numbers.

Awning Fabric Durability: Sunbrella vs Standard Canvas in South Florida

Fabric durability separates awnings that last three summers from ones that last fifteen. Solution-dyed acrylic, the category Sunbrella belongs to, holds color and resists mildew far better than standard cotton-canvas blends in coastal humidity.

South Florida weather is the real test. Salt air, afternoon storms, and year-round UV break down cheap fabric fast.

What most guides miss is that the fabric is only half the equation. Stitching, thread type, and how the cover is tensioned matter just as much. A premium fabric sewn with weak thread still fails at the seams.

At A to Z Awnings & Marine Canvas, we build every cover from Sunbrella fabric, and we back both the material and our workmanship with a 10-year warranty.

Fabric Type Color Retention Mildew Resistance Typical Lifespan
Solution-dyed acrylic Excellent High 10-15 years
Standard canvas blend Fair Low 3-5 years
Vinyl-laminated Good High 7-10 years

Awning Contractor Warranty: What Each Company Actually Covers

An awning contractor warranty is only as good as its terms, and the terms are where companies quietly differ. Ask for the written warranty before you compare quotes, not after.

Three things decide whether a warranty is real:

  1. What’s covered. Fabric, frame, motor, and labor are often separate line items. Some warranties cover the material but not the install.
  2. How long. A 10-year warranty on both workmanship and material is stronger than a 10-year material warranty with a 1-year labor cap.
  3. Who honors it. A local manufacturer that services its own installs is easier to hold accountable than a dealer passing along a third-party guarantee.

A warranty comparison framework you can use on any bidder

Rather than guess at terms, put the same questions to every contractor in writing and compare the answers line by line:

Question Why it matters
What is the workmanship term, separate from the material term? Workmanship covers the install; material covers the fabric and frame. They expire on different clocks.
Is labor included on a claim, or parts only? Parts-only coverage can still leave you paying for the crew that does the repair.
Who performs the repair, the manufacturer, a dealer, or a third party? The party that built and installed the awning is usually the fastest to service it.
What are the exclusions? “Acts of weather,” improper cleaning, and commercial use are common carve-outs.
Is the warranty transferable if you sell the property? Transferability affects resale value and is often overlooked.
What is the response window for a service call? A stated response time is more useful than a vague promise of support.

After-sales support and service response

Warranty terms only matter if someone answers the phone. When you evaluate a contractor, ask how service requests are handled: whether there’s a dedicated service line, whether repairs are scheduled on a set cadence, and whether the same crew that installed the awning handles warranty work. A local manufacturer that keeps its own fabrication shop can usually turn a repair faster than a dealer that has to order a replacement cover from an out-of-state supplier.

Call us today for a free estimate →

Homeowners can be impacted by warranties that exclude “acts of weather,” which in this region covers almost everything. Read the exclusions first.

Key Takeaway
The warranty question to ask is simple: “If the motor fails in year four, who pays for the part and who pays for the labor?” If the answer is vague, the coverage is thin.
Pro Tip
Keep your written warranty, your line-item quote, and your permit paperwork together. When a claim comes up years later, the original scope of work is what determines whether the repair is covered.

Awning Maintenance: Long-Term Costs and Service Options

Awning maintenance is cheap when it’s routine and expensive when it’s ignored. A yearly cleaning and inspection keeps fabric, stitching, and hardware in shape and catches small problems before they become replacements.

A practical annual routine looks like this:

  • Rinse the fabric with mild soap and water, then let it air dry fully
  • Inspect stitching and seams for pulling or rot
  • Check mounting hardware and anchors for rust or loosening
  • Test retractable arms and motors for smooth operation
  • Look for mold or mildew, especially on north-facing and shaded panels
  • Re-tension or adjust the cover if it sags

Repair versus replace is the question we hear most. If the frame is sound and only the fabric has faded or torn, recovering the awning usually costs less than a full replacement. If the frame is bent, corroded, or the motor has failed twice, replacement makes more sense.

A local contractor can inspect the frame and give you a straight answer. That inspection is also the moment to confirm your awning still meets current wind-load and permit requirements.

How to Evaluate Customer Reviews and Ratings for Both Companies

Customer reviews and ratings tell you more than a star average, if you read them correctly. Look at the pattern across recent reviews, not the single best or worst one.

Here’s how to weigh what you find:

  • Recency matters. A five-star review from six years ago says little about how the company operates now.
  • Look for specifics. Reviews that name a fabric, a timeline, or a service call are more useful than “great job.”
  • Check business reputation signals. A BBB rating and accredited business status, plus proper state licensing, are worth verifying directly.
  • Read the complaints. How a company responds to a bad review often reveals more than the review itself.

For any contractor, confirm the license number on file. Ours is Awning Contractor Rachel Mendes Cramer, license #20-AE-21988-X, serving Broward and Palm Beach under #U-22481.

The Better Business Bureau’s guidance on checking a business is a good starting point for verifying complaints and accreditation before you commit.

Which Awning Contractor Should You Choose for Your Project?

The right choice depends on your project, your timeline, and how much customization you need. For a simple stock-size cover, a general installer may work.

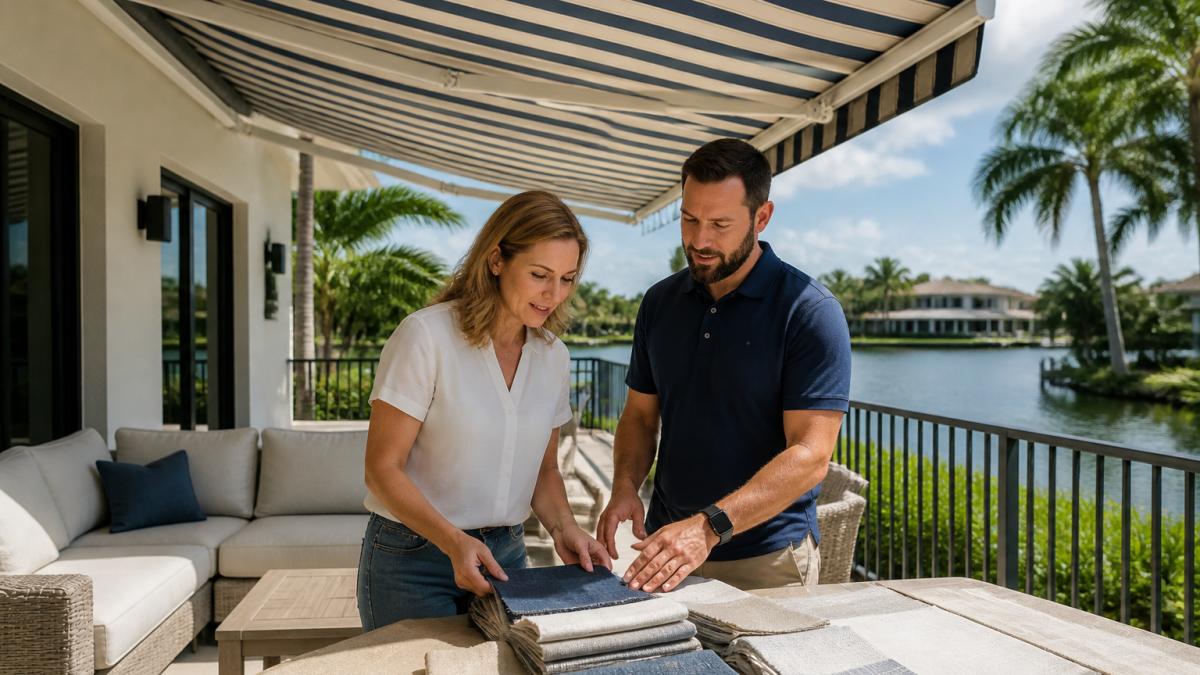
A homeowner and contractor reviewing awning fabric samples on a patio in bright South Florida sunlight, with a retractable awning visible in the background

Here’s how to decide:

Your Situation Best Fit
Standard-size patio cover, tight budget General installer
Custom angles, odd dimensions Custom manufacturer
Restaurant or commercial storefront Commercial awning specialist
Boat enclosure or marine canvas Marine canvas fabricator
Existing awning needs repair Full-service manufacturer

A to Z Awnings & Marine Canvas manufactures custom awnings to fit specific dimensions, offers hundreds of Sunbrella fabrics, and covers both workmanship and material with a 10-year warranty.

Before you commit to anyone, confirm licensing, get a line-item quote, and read the warranty exclusions. The Florida Department of Business and Professional Regulation lets you verify a contractor’s license status directly.

Frequently Asked Questions

How should I compare awning installation quotes from Hoover Awnings and Delray Awning?

Request itemized quotes that break down frame material, fabric brand, hardware, labor, and permit fees. Ask whether the price includes removal of your old awning and disposal. Verify each contractor’s license number with the state and confirm they carry liability insurance and workers’ compensation. A lower bottom-line number often means thinner fabric, lighter-gauge aluminum, or a shorter warranty. Compare the full scope, not just the total.

What warranty details should I check before choosing an awning contractor?

Look for two separate warranty periods: one for workmanship and one for materials. Workmanship coverage protects against installation defects like loose brackets or poor stitching, while material coverage protects against fabric fading, cracking, or frame corrosion. Ask whether the warranty is prorated, who handles labor costs on a claim, and whether it transfers if you sell your home. Get all terms in writing before signing.

How long do awning fabrics typically last in South Florida’s sun?

Solution-dyed acrylic fabrics like Sunbrella carry a 10-year limited warranty against fading and loss of strength under normal conditions. In South Florida’s intense UV environment, uncoated or lower-grade canvas may show visible fading within three to five years. Fabric durability depends on UV exposure, salt air, and whether the awning is retracted during storms. Regular cleaning extends fabric life regardless of brand.

What are the common problems with retractable awnings?

The most frequent issues are motor failure, fabric mold from trapped moisture, bent arms from wind damage, and stitching that separates after years of sun exposure. Motor problems often stem from water intrusion or undersized units. Mold develops when awnings stay wet and are rolled up damp. Wind damage occurs when awnings are left extended during gusts. Choosing a contractor with strong warranty coverage and a maintenance plan reduces these risks.


Choosing an awning contractor is a long-term decision, and the cheapest quote rarely delivers the longest life. A to Z Awnings & Marine Canvas builds custom residential, commercial, and marine shading solutions, backed by a 10-year warranty on workmanship and Sunbrella material and a fabric library of hundreds of options. Call us today for a free estimate and get a shade solution built to survive South Florida weather.

Marine Canvas Repair vs Replacement: 2026 Guide

Table of Contents

Last Updated: October 5, 2026

Marine Canvas Repair vs Replacement: The Quick Comparison

Marine canvas faces salt, UV, rain, and constant flexing, so the marine canvas repair vs replacement decision comes down to one question: is the fabric still strong, or have only the stitching and hardware failed?

At A to Z Awnings & Marine Canvas, we build and service custom boat canvas, enclosures, and covers. Below, we break down how to inspect your canvas, what each type of damage means, and how to decide.

Key Takeaway
The single rule that settles most cases: repair when the fabric is still strong and the damage is localized; replace when the fabric itself is weak, shrunken, or failing across multiple panels.
Situation Fabric Condition Best Move Why
Torn seam, sound fabric Strong, flexible Restitch or patch Cheap fix, keeps original fit
One failed zipper or snap Strong, flexible Replace hardware Panel and fabric stay in service
Small rip or puncture Strong, flexible Patch Localized damage, low cost
Brittle, faded, shrunken canvas Weak, aged Replace Repairs will not hold
Multiple panels failing at once Worn throughout Replace Repair cost approaches replacement

How to Inspect Marine Canvas and Test Whether Fabric Is Still Sound

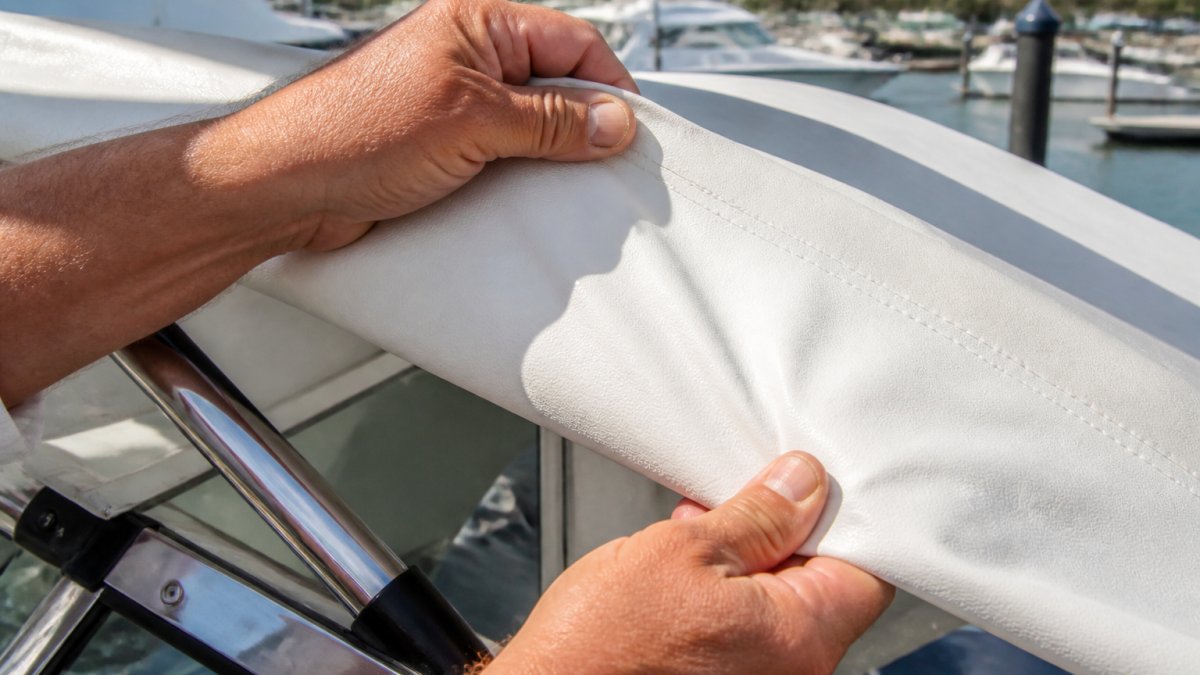
Start with your hands, not your eyes. A faded fabric can still be structurally fine, and one that looks intact can be dangerously weak. Pull and flex a section: if it feels supple and springs back, it is likely sound.

Boat owner testing the flexibility of white marine canvas at a sunny marina to check for fabric brittleness

A few checks before you call anyone:

  • The pull test: Gently tug at a seam edge. Sound fabric holds; brittle fabric rips.
  • The underside check: Mildew, dark staining, and delamination often show underneath first.
  • The water test: Spray a small area. If water beads, the finish is intact. If it soaks straight through, water resistance is gone.

The American Boat & Yacht Council standards for canvas and topside equipment are the reference point many marine fabricators work from when judging whether canvas and its fasteners are still fit for service.

Boat Canvas Lifespan: How Age, Fading, and Sagging Change the Math

The decision is not really repair versus replacement. It is how many more seasons you get for the money. A repair that buys one summer is expensive at any price; a replacement that buys a decade is cheap even at a high sticker.

What determines how long marine canvas lasts

Four factors matter most:

  • Fabric type. Solution-dyed acrylics are the benchmark for colorfastness and UV resistance because the pigment runs through the fiber. Lighter, uncoated fabrics break down faster.
  • Sun exposure. A cover stored under a roof will outlast an identical cover left in open sun. UV is the biggest driver of fabric degradation.
  • Thread and stitching. UV degrades thread faster than fabric, so seams typically fail first. A cover can look fine and still be coming apart at every stitch line.

Expected service life after a repair

A repair does not reset the clock on the fabric. It buys time on the specific failure you fixed, while the surrounding material keeps aging. In practice:

  • A restitched seam on sound fabric can hold for several seasons.
  • A patch on a clean tear in supple material typically holds until the surrounding fabric reaches the end of its life.
  • A patch on brittle or sun-degraded canvas often fails within a season, because the patch edge cannot bond to breaking-down material.

Watch for this pattern: each repair on the same cover tends to last less time than the one before it, because the fabric underneath is progressively weaker.

Expected service life after replacement

A full replacement resets everything: new fabric, thread, hardware, and patterning. That is why replacement wins on long-term value once the fabric has aged out, even though the up-front cost is higher.

How to compare the two honestly

Do the math in seasons, not dollars. Estimate how many seasons the repair will realistically buy, then divide the repair cost by that number. Do the same for replacement. The lower cost per season is the better value.

Key Takeaway
Repair wins when the fabric is sound and the fix is localized. Replacement wins when the fabric has aged out, because a repair on weak canvas buys one or two seasons while a new cover buys many. Compare cost per season, not cost per job.

The signs that the clock has run out

Sagging, leaking, and shrinkage are the three signals that fabric condition has crossed the line. A sagging cover no longer sheds water, so water pools, adds weight, and stretches the fabric further. Leaking usually starts at seams and stitch holes. Shrinkage is the quiet one: canvas that has pulled tight may no longer reach its fasteners or line up with the frame, and no amount of restitching will bring it back.

When to Repair: Rips, Tears, Holes, and a Marine Canvas Patch

Repair is the right call when damage is localized and the surrounding fabric is still strong. A marine canvas patch is the standard fix for small rips, tears, and holes, restoring water resistance and appearance when matched to the original fabric. The patch must bond to sound material; patching brittle canvas fails at the patch edge.

How to Repair a Torn Boat Cover: Steps for Small Damage

Small damage is genuinely DIY-friendly. Here is the sequence we would follow:

  1. Clean and dry the area fully. Adhesive will not bond to a damp or dirty surface.
  2. Trim loose threads so the tear lies flat.
  3. Cut a patch that overlaps the damage by at least an inch on every side.
  4. Round the patch corners so they are less likely to lift.
  5. Apply marine-grade adhesive or patch cement per the manufacturer’s instructions.
  6. Press the patch down firmly and let it cure fully before the cover goes back on.
  7. Check the repair after the next rain or wash-down.
Watch Out
The most common DIY mistake is patching over a seam or a stress point. Patches placed there peel within weeks because the fabric is still moving under load. Move the patch or reinforce the area instead.

When to Replace: Zippers, Snaps, Hardware, and Panel Replacement

Hardware failure does not mean the canvas is finished. Zippers, snaps, and fasteners wear out faster than fabric, and replacing them is routine service that keeps a good cover in use.

Call us today for a free estimate →

Panel replacement is the middle path. You can see how different shops frame this trade-off in the National Canvas guide to boat canvas repair versus replacement, which makes the same point: repeated repairs eventually cost more than a new cover.

Boat Canvas Replacement Cost and Repair Cost: What Changes the Estimate

Most articles say repair is cheaper than replacement and stop there. That is true, but not useful when you are staring at a quote. The real question is what drives the number, and whether the repair will still be holding in two years.

What you are actually paying for

Every marine canvas job breaks down into five cost buckets. Knowing which apply tells you whether a quote is reasonable.

  • Labor time. The biggest variable. A restitch along one seam might take under an hour of bench time; rebuilding a full cockpit enclosure with new panels, windows, and hardware can run into multiple days. Complexity drives the total more than material does.
  • Material. Replacement is priced by the square yard of fabric plus clear window vinyl, binding, and reinforcement. Premium solution-dyed acrylics cost more per yard but hold color and strength far longer, which changes the long-term math.
  • Patterning and fitting. A replacement cover has to be patterned to your frame, then test-fit on the boat. Patterning is skilled work, which is why two covers that look identical in photos can quote very differently. Repairs usually skip patterning unless a panel is being rebuilt.

Why repair and replacement quotes are not directly comparable

A repair quote covers a small, defined area; a replacement quote covers the whole cover, including patterning, all hardware, and full installation. The gap can look enormous on paper but narrows once you account for how long each option lasts.

A common pattern: a cover needing its third or fourth repair in two seasons is already costing more per year of service than a replacement would have.

Factors that push a quote up or down

  • Panel count and geometry. More panels and tighter curves mean more patterning and more seams to seal.
  • Window vinyl. Large clear panels cost more in material and labor, and vinyl has a shorter service life than the canvas around it.
  • Frame condition. A bent or corroded frame has to be corrected before new canvas will fit, and that is separate work.
Pro Tip
When you compare a repair quote to a replacement quote, ask each one for the expected service life of the work. A repair that buys two seasons and a replacement that buys ten are not the same purchase, even if the repair is a fraction of the price.

Because every boat and enclosure is different, a real number requires seeing the job. Send photos of the damage, the frame, and the full cover, and a shop can usually tell you which side of the repair-or-replace line you are on before anyone drives out.

Repairability by Material and Damage Type

Not all canvas is equally repairable, and the material matters as much as the damage. Heavier, coated marine fabrics hold patches and stitches well when still supple. Lighter fabrics and older, sun-degraded material are harder to repair because the surrounding area cannot support the repair. A clean tear repairs better than a frayed, spreading rip, and a failed seam better than a torn panel.

Damage Type Repairable? Best Fix
Failed seam, sound fabric Yes Restitch
Small rip or puncture Yes Patch
Broken zipper or snap Yes Hardware replacement
Single failed panel Yes Panel replacement
Brittle or shrunken fabric No Full replacement
Multiple failing panels Rarely Full replacement

DIY Repair vs Professional Work: What You Can Do Yourself

Small repairs are within reach for most boat owners. Patching a clean tear, replacing a snap, or treating a minor seam is realistic with the right materials and patience.

Our honest advice: patch small damage yourself if you are comfortable, and bring anything involving seams, zippers, or panel replacement to a shop. A failed DIY seam repair can let water into the boat, a far more expensive problem than the original tear.


The hard part of marine canvas repair vs replacement is not the work, it is the judgment call, and getting it wrong costs you either money or another failed cover. At A to Z Awnings & Marine Canvas, we manufacture and service custom marine canvas, from full enclosures to individual panel repairs, using premium Sunbrella fabrics backed by a 10-year warranty on both workmanship and materials.

Frequently Asked Questions

How much does it cost to replace a boat canvas?

Boat canvas replacement cost depends on size, material, and whether you need a full cover system or individual panels. Small repairs are generally less costly than larger or more complex repairs. A full replacement costs more because it involves new fabric, restitching, and hardware. Request a written quote so the estimate reflects your boat’s exact dimensions and enclosure type.

What is the best patch for repairing a canvas boat cover?

The best marine canvas patch matches the original fabric type and is applied with proper adhesive or stitching. Peel-and-stick patches work for temporary fixes, but a stitched patch on sound fabric lasts longer and maintains water resistance. For Sunbrella or similar acrylic canvas, use a patch of the same material and restitch it along the edges. If the surrounding fabric is brittle or faded, a patch may not hold, and replacement becomes the better option.

How do you know when boat canvas needs to be replaced?

Replace boat canvas when the fabric fails a strength test, meaning it tears easily when pulled or feels brittle. Other signs include widespread fading, shrinkage that no longer fits the frame, sagging that collects water, and thread failure along multiple seams. If damage is limited to one zipper or a small tear on sound fabric, repair is worth it. When deterioration is broad, replacement delivers better long-term value than repeated patches.

Can a marine canvas enclosure be repaired?

Yes, most marine canvas enclosures can be repaired when the fabric itself is still sound. Common fixes include restitching seams, replacing zippers and snaps, and patching isolated rips or holes. A cockpit enclosure with one failed zipper and good fabric is a strong repair candidate. If the enclosure has shrunken, the panels no longer align, or the fabric tears at the seams, replacement of individual panels or the full system makes more sense.

Is it worth repairing an old boat cover?

It depends on fabric condition and repair scope. Repeated repairs can eventually cost more than replacement, and some damage is too severe for patching. Repair makes sense when the canvas is young, the damage is localized, and the fix restores water resistance. Replacement wins when the fabric is old, weak, or broadly deteriorated. A professional assessment gives you a clear repair-versus-replace recommendation before you spend.

How to Fix Awning Fabric: DIY Repair Guide

Table of Contents

Last Updated: October 4, 2026

How to Fix Awning Fabric: Assessing Damage Before You Repair

Learning how to fix awning fabric starts with one honest look at the damage. Awnings live outside all year.

This guide covers the full repair process, from damage assessment to patching to knowing when to call a pro.

Most small awning fabric repairs are doable in an afternoon with basic tools. But the repair only lasts if you match your method to the damage type.

Tears, Punctures, and Seam Separation: What You’re Looking At

Not all damage is the same. And the fix changes based on what failed.

  • Tears are long rips, usually along a seam or fold line. They spread fast under wind load.
  • Punctures are small holes, often from branches, hail, or sharp edges on the awning frame.
  • Seam separation is when the stitching pulls apart. The fabric itself is fine, but the thread has failed.

The repair method differs for each. Tape works on punctures. Glue works on seams. Tears often need both.

Repair or Replace? A Severity Decision Tree

Use this test before you buy anything:

  • Damage under 2 inches, no seam involved → tape patch, DIY
  • Damage 2-6 inches, clean edges → fabric patch with adhesive, DIY
  • Seam separation under 12 inches → fabric glue, DIY

If the fabric cracks when you pinch it, no patch will hold.

Cleaning Awning Fabric Before Any Repair

Adhesive and tape only stick to clean, dry fabric; skip this step and your patch peels within weeks.

Here’s the cleaning process:

  1. Brush off loose dirt with a soft brush.
  2. Mix mild soap with warm water.
  3. Scrub the damaged area and a few inches around it with a sponge.
  4. Rinse with clean water.
  5. Let it dry fully, at least 2 hours in direct sun.

Never use harsh detergents or bleach. They break down the fabric coating and make the next repair harder.

For stubborn mold or mildew, a diluted vinegar solution works well. Rinse thoroughly after.

Pro Tip
Clean at least 3 inches past the damage edge. Adhesive needs clean fabric to bond, and dirt wicks outward from old tears.

What’s in an Awning Fabric Repair Kit

A basic awning fabric repair kit costs little and covers most small jobs. Have on hand:

  • Repair tape for small holes and punctures
  • Fabric adhesive or glue for seams and edges
  • Patch material (vinyl or acrylic, matched to your fabric)

Buy these as a kit or piece them together, and match the patch material to your awning fabric type. A vinyl patch won’t bond well to acrylic fabric, and vice versa.

Choosing Awning Repair Tape for Small Holes and Tears

Awning repair tape is the fastest fix for small damage, but “repair tape” is not one product. Backing, adhesive chemistry, and thickness differ, and the wrong combination is the most common reason a patch lifts within a season. Match the tape to the fabric, not the hole size.

Match the Tape to the Fabric

  • Vinyl (laminated or coated) awnings: Use a vinyl-facing tape with a clear or color-matched PVC backing and a rubber- or acrylic-based pressure-sensitive adhesive. Vinyl is non-porous, so the adhesive bonds to the surface film only. A tape designed for canvas will sit on top of the vinyl and slide.
  • Acrylic (solution-dyed, woven) awnings: Use a woven acrylic or fabric-backed tape with an acrylic adhesive. Acrylic fabric is breathable and slightly textured, so a stiff vinyl tape will not conform to the weave and will peel at the edges. A fabric tape moves with the weave.
  • Polyester or olefin blends: Treat these like acrylic for tape selection. The weave, not the fiber, drives adhesion.

If you cannot identify the fabric, check the underside or the original spec tag. Most retractable awnings use a vinyl laminate or a solution-dyed acrylic, and the two do not share tape.

What to Look For on the Label

  • Adhesive type: Acrylic adhesive handles UV and temperature swings better than rubber. Rubber grabs faster but degrades sooner in sun.
  • Backing thickness: A 10-12 mil backing conforms to curves and folds. Thicker backing is stiffer and better for flat panels but peels at seams.
  • UV rating: Look for a tape rated for outdoor exposure. Indoor-rated tape will yellow and lose tack within one summer.

How to Apply Awning Repair Tape

  1. Clean and dry the area fully; adhesive will not bond to dust, mold residue, or old wax.
  2. Cut a patch 1-2 inches larger than the damage on all sides.
  3. Round the corners, since square corners catch wind and peel first.
  4. Peel the backing and press the patch on, starting at one edge.
  5. Smooth from the center outward to push out air bubbles.
  6. Press firmly with a roller or hand for 30 seconds; friction heat helps the adhesive wet out.

Temperature and Cure

Most pressure-sensitive awning tapes need surface temperatures above 50°F to bond and reach full strength in 24 hours. Below 50°F, the adhesive stays tacky but never flows into the weave, and the patch lifts at the first strong wind. In cold weather, warm the fabric with a hair dryer on low, apply the tape, and keep pressure on it until it cools.

Watch Out
Do not stretch the tape as you apply it. Stretching thins the adhesive layer and creates tension that pulls the patch off as the awning rolls. Lay it flat and let the adhesive do the work.
Pro Tip
For punctures under 1 inch on vinyl, a drop of clear vinyl adhesive under a small tape patch adds a mechanical bond that survives repeated rolling. On acrylic, skip the adhesive and rely on the tape alone, since glue can stiffen the weave and cause a crease.

When Tape Is the Wrong Tool

Tape is for punctures and short, clean tears with intact edges, not for:

  • Seam separation, where the thread has failed and the fabric edges have pulled apart
  • Tears longer than about 6 inches, where wind load concentrates at the tape edges
  • Damage within 2 inches of a seam or the roller attachment, where flexing breaks the bond

For those cases, move to a fabric patch with adhesive or a sewn repair, covered in the sections below.

Using Awning Fabric Glue for Seams and Edges

Awning fabric glue is the right tool for seam separation and edge repairs, but the adhesive you choose and the conditions you cure it in determine whether the repair lasts one season or five.

Call us today for a free estimate →

Close-up of hands applying fabric adhesive along a separating seam on a retractable awning, with a small brush and tube of glue visible on a ladder platform in bright daylight

Pick the Adhesive for Your Fabric

  • Vinyl awnings: Use a vinyl-specific adhesive or a flexible urethane adhesive. Vinyl adhesives chemically weld to the vinyl surface. A general-purpose craft glue will not bond and will peel cleanly off.
  • Acrylic awnings: Use a flexible acrylic or urethane adhesive labeled for outdoor fabric. Acrylic weave needs an adhesive that stays pliable so the seam can flex without cracking.
  • Marine and RV applications: Use a marine-grade adhesive rated for UV and salt exposure. Standard outdoor adhesives break down faster in salt air.

Avoid rigid epoxies and cyanoacrylate (super glue). Both cure hard and crack the first time the awning rolls.

How to Repair a Seam with Fabric Glue

  1. Clean the seam area and let it dry fully; adhesive will not bond to mold residue or old wax.
  2. Open the seam so both fabric edges are exposed, trimming old thread flush with small scissors.
  3. Apply a thin, even bead of glue along both edges; a thick bead traps solvent and slows cure.
  4. Press the edges together firmly and hold for 30 seconds.
  5. Wipe off excess glue with a damp cloth before it sets.
  6. Clamp or weight the seam if possible; binder clips with cardboard under the jaws work well.
  7. Let it cure fully before retracting the awning.

For edges pulled away from the frame, apply glue along the fabric edge, press it back into place, and hold it with painter’s tape until it sets; remove the tape after 24 hours.

Cure Time, Temperature, and Humidity

Cure time is not a suggestion; a rushed seam repair fails in the first windstorm. Working targets:

  • Surface dry (do not touch): 30-60 minutes
  • Handling strength (can move the awning gently): 24 hours
  • Full cure (can retract and expose to wind): 48-72 hours

Below 50°F, most flexible adhesives stop curing. In cold weather, work indoors if the awning is removable, or use a heat lamp to keep the repair area warm through the cure window.

Key Takeaway
Curing time matters more than application. Give every glue repair a full 48-72 hours before retracting the awning or exposing it to wind. A seam that feels dry at 24 hours is still developing bond strength.

Post-Repair Testing

Before you call the repair done:

  1. Wait the full cure window.
  2. Gently flex the seam by hand. It should move with the fabric, not crack or separate.
  3. Retract and extend the awning once, slowly, and watch the seam for lifting.
  4. Check again after the first rain. Water finds any gap the eye misses.
  5. Re-check after the first windy day. Wind load is the real test.

If the seam lifts at any step, the adhesive did not bond. Clean the area, remove the failed adhesive, and reapply; do not simply add more glue on top.

Why Seams Fail in the First Place

Seam separation is usually a symptom, not the root problem. Common causes:

  • UV degradation of thread: Polyester thread loses strength after years of sun exposure. The fabric is fine; the thread is not.
  • Abrasion at fold lines: Every retraction rubs the seam against itself. Over time the thread wears through.
  • Tension imbalance: A misaligned roller or a bent arm puts uneven load on one seam, which fails first.

If the same seam keeps failing after repair, the cause is mechanical, not adhesive. Check roller alignment and arm tension before repairing again.

Replacing Retractable Awning Fabric: When DIY Stops Making Sense

Signs it’s time to replace instead of repair:

  • Multiple tears across the fabric
  • Fabric that’s brittle, faded, or cracking
  • Damage along the roller attachment

DIY replacement is possible on some models, but most retractable awnings need a pro.

This is where we come in. A to Z Awnings & Marine Canvas handles fabric replacement on retractable and folding-arm awnings, plus marine canvas.

Marine canvas repairs add another layer: salt air and UV exposure wear fabric faster, so patches fail sooner on boats than on patios.

If you’re weighing repair versus replacement, get a professional assessment first.

Damage Type DIY Fix Pro Repair Replace Fabric
Small puncture (under 2 in) Repair tape Not needed No
Small tear (2-6 in) Fabric patch + glue Optional No
Seam separation (under 12 in) Fabric glue Optional No
Large tear (over 6 in) Not advised Yes Sometimes
Brittle or cracking fabric No No Yes
Multiple tears or seam failures No Assess first Usually yes

Frequently Asked Questions

How can I repair a rip in my awning fabric?

Clean the area with mild soap and water, let it dry completely, then apply a peel-and-stick awning repair tape or a fabric patch that overlaps the rip by at least 1 inch on all sides. For rips longer than 6 inches or those near a seam, use awning fabric glue instead. Press firmly and let it cure 24 hours before retracting the awning. If the fabric around the rip is brittle or faded, replacement is the better call.

What type of glue is best for repairing awning fabric?

Look for a flexible, waterproof fabric adhesive made for vinyl or acrylic awning fabric, not a general-purpose craft glue. Awning fabric glue needs to stay flexible through heat, cold, and UV exposure so the seam does not crack. Apply a thin, even bead along the seam, press the fabric together, and weight it down for the full cure time listed on the label. Most adhesives need 24 hours before the awning goes back out in the sun.

Can I replace awning fabric myself?

Yes, if you have a helper, a sturdy ladder, and patience. Replacing retractable awning fabric means removing the roller end caps, sliding the old fabric out of the roller and frame channels, and feeding the new fabric in the same way. Measure the roller length and the fabric width accurately before ordering. On larger awnings or anything mounted above the first floor, hiring a professional is safer and often faster.

When should awning fabric be replaced instead of repaired?

Replace when the fabric has multiple tears, widespread fading, mold that returns after cleaning, or seams that keep separating after repair. A good rule: if repairs would cover more than about 20 percent of the fabric surface, or the fabric is over 10 years old, replacement usually costs less over time. Small isolated holes and single seam failures are still worth repairing.


Small awning repairs are worth doing yourself. Big ones aren’t. The line between the two comes down to fabric condition, damage size, and whether the frame or roller is involved.

When a patch won’t cut it, A to Z Awnings & Marine Canvas can help. We build and service custom awnings for homes, restaurants, and boats, using premium Sunbrella fabrics and backing every job with a 10-year warranty on workmanship and materials. Call us today for a free estimate.

Commercial Patio Shade Systems in Florida: 2026 Guide

Table of Contents

Last Updated: October 2, 2026

Why Florida Patios Need Engineered Shade Systems

Commercial patio shade systems in Florida are structural equipment built to survive hurricane-season wind loads, salt air, and year-round UV that destroys ordinary fabric. At A to Z Awnings & Marine Canvas, we manufacture and service custom shading for restaurants, commercial properties, and homes across Broward and Palm Beach counties, and the failures we repair almost always trace back to one thing: a system never engineered for this climate.

Types of Commercial Patio Shade Systems Compared

Three families of shade systems dominate commercial patios, each solving a different problem. Retractable awnings give adjustable coverage attached to the building. Shade sails and fabric canopies cover open areas without wall support. Commercial umbrellas and modular structures offer flexibility where nothing can be permanently anchored.

Diners seated under a retractable fabric awning as one of the popular patio shade systems at a sunny restaurant.
System Best For Coverage Type Key Tradeoff
Retractable awnings Restaurants, storefronts Building-attached, adjustable Needs sound mounting and wind sensors
Shade sails and fabric canopies Open patios, playgrounds Freestanding, fixed No adjustability once installed
Commercial umbrellas Flexible seating, events Portable, repositionable Lower wind resistance

Retractable Awnings

Retractable awnings mount to the building and extend over the patio on demand. The advantage is control: extend for midday sun, retract ahead of a storm. Motorized units with wind sensors retract automatically when gusts pick up. The tradeoff: mounting structure and mechanism both have to be right, a cheap motor on a heavy awning is the most common failure point we see on service calls.

Shade Sails and Fabric Canopies

Shade sails use tensioned, permeable fabric stretched between steel anchor points. Because the fabric is permeable, hot air escapes instead of collecting underneath, keeping the space cooler than a solid cover. High-density polyethylene and tensile fabric sails block UV while letting breezes through, suiting open patios, parks, and playgrounds with no wall to attach to. Once installed, coverage is fixed, so the design has to be right the first time.

Commercial Umbrellas and Modular Structures

Cantilever and center-pole commercial umbrellas move where you need them, useful for patios that reconfigure for events. Modular structures take that flexibility further, letting you add or rearrange shade sections as seating changes. Umbrellas carry the lowest wind rating of the three, so they come in at night or ahead of storms in coastal areas.

Why Do Outdoor Awnings Fade? Fabric, Sun, and Salt Air

Pro Tip
The fastest way to extend fabric life is to keep it clean. Salt and pollen bond to the weave and hold moisture against the fibers. A gentle rinse every few weeks during the dry season removes both before they do damage.

Awnings that fail early usually fail for one of four reasons: surface-dyed fabric, standard thread, corroding hardware, or a frame undersized for the wind it faces. Fix any one and the lifespan stretches considerably.

Wind Load and Building Code Requirements for Shade Structures

Shade structures in Florida are regulated as structures, not furniture, which means they must be engineered for wind load and permitted through the local building department before a single anchor is set. Wind load is the lateral and uplift force a structure must resist based on its size, height, attachment method, and site location. Coastal exposure zones carry the highest requirements, and a shade structure not engineered to them can fail inspection, void insurance coverage, or become a projectile in a storm.

  • Basic wind speed (Vult): The ultimate design wind speed for the site, read from the wind-speed maps in the code. Coastal Broward and Palm Beach County sit in some of the highest wind-speed zones in the state.
  • Exposure category: B, C, or D, based on how open the terrain is. An oceanfront patio is Exposure D; a site surrounded by low-rise buildings may qualify as B. Exposure D produces the highest pressures.
  • Risk category: Assigned by occupancy. A restaurant patio, a school playground, and a single-family home can fall into different categories, and higher categories carry stricter factors.
  • Height and topography: Taller structures and sites on or near ridges see higher pressures.
  • Attachment method: A building-attached awning transfers load into the wall and roof structure; a freestanding sail or canopy resists load through its own footings and anchors. The two are engineered completely differently.

The Permit Process, Step by Step

For commercial patios, the permit path typically runs through the county or municipal building department, in this sequence:

  1. Confirm zoning and site rules. Some commercial districts restrict projections over sidewalks, setbacks, or easements. Check before you design.
  2. Commission the engineering. A licensed engineer or the manufacturer’s engineering department produces stamped drawings showing the wind-load calculation, frame sizing, and anchor details.
  3. Assemble the submittal package. This usually includes the stamped drawings, a product data sheet or Florida Product Approval (or a local product approval) for the shade system, the contractor’s license information, and a site plan.
  4. Submit and pay fees. Review timelines vary by jurisdiction and design complexity, some run days, others several weeks.
  5. Pull the permit and install. Installation must match the approved drawings. Substitutions on frame gauge or anchor size can trigger a re-review.
  6. Pass the inspection. Most jurisdictions require at least a final inspection, and some require a footing or anchor inspection before the structure is closed up.
Watch Out
An awning or shade structure installed without a permit can fail inspection and may void your property insurance. In a storm, an unengineered structure becomes a hazard to people and property, and the liability lands on the owner, not the installer.

What This Means for a Commercial Patio

For a restaurant or commercial property, treat the shade system like any other permitted improvement. Budget for engineering and permit time alongside the hardware, and choose a manufacturer who can supply the stamped drawings and product approvals your jurisdiction will ask for. A system that arrives with engineering documentation attached moves through review far faster than one requiring the contractor to reverse-engineer the numbers afterward.

Maintenance Tips for Outdoor Shade Systems in Coastal Climates

  • Rinse fabric and frames with fresh water every few weeks to remove salt and pollen
  • Brush off mildew with a soft brush and mild soap, never a stiff brush or bleach
  • Lubricate retractable mechanisms and check tension at the start of each season
  • Inspect stitching and seams for pulled threads before and after storm season
  • Retract or remove umbrellas and free-standing units ahead of named storms
  • Check anchors and mounting hardware for corrosion annually
Key Takeaway
The single highest-return habit is a fresh-water rinse. It takes minutes and removes the salt and pollen that hold moisture against fabric and hardware.

Repair versus replace is the question most owners ask. If the fabric is structurally sound and only the stitching has failed, restitching is often the practical fix. If the fabric has gone brittle, the color has chalked out, or the frame has corroded through, replacement is the better spend. A full-service shop can assess both and tell you which one you are looking at.

Call us today for a free estimate →

Commercial Retractable Awning Cost: What Drives the Price

Commercial retractable awning cost depends on four variables: size, fabric grade, mechanism, and mounting conditions. Any quote that does not account for all four is incomplete. Width and projection set the material volume, fabric grade determines how long the color and weave hold up, the mechanism, manual or motorized, sets the moving-parts cost, and mounting conditions determine how much structural work the installation needs.

The ROI Case: Shade as Revenue, Not Overhead

For a restaurant or hospitality operator, the better question is not what the awning costs but what the covered square footage earns. A patio that bakes in direct afternoon sun sits empty during peak lunch and early-dinner hours. Shade converts that dead space into usable seating, and usable seating is revenue. The math most operators run:

  • Covered seats × turns per day × average check. If shade adds even a handful of usable tables during the hottest hours, the added covers can offset a meaningful share of the project cost over a single season.
  • Extended season. Shade and the cooling it provides can stretch the comfortable outdoor season at both ends of the year, adding weeks of patio revenue.
  • Reduced cooling load. Shading glass doors and windows on a south- or west-facing facade reduces solar heat gain, which lowers the load on the building’s air-conditioning system. The savings show up on the utility bill, not the awning invoice.
  • Asset protection. Shade protects tables, chairs, finishes, and flooring from UV degradation, extending the replacement cycle on furniture and finishes.

How to Compare Quotes

Because the variables change so much from one patio to the next, pricing has to be quoted per project. The fastest way to an accurate figure is a site assessment, where the contractor measures the space, checks the mounting surface, and factors in wind exposure. When reviewing bids, ask each contractor to break the quote into these line items so you can compare apples to apples:

  • Structure and frame (gauge, finish, and wind rating)
  • Fabric (brand, weave, and warranty length)
  • Mechanism (manual vs. motorized, wind sensor included?)
  • Engineering and stamped drawings
  • Permit support and inspection coordination
  • Installation labor and any structural reinforcement
  • Warranty terms on workmanship and material
Best For
Restaurant owners and commercial property managers who need adjustable, building-attached coverage that can be retracted ahead of storms, and who want to weigh the project against the revenue the covered seating generates.

How to Choose a Commercial Patio Shade System

Choosing a commercial patio shade system starts with three questions: how much area needs cover, does the coverage need to adjust, and what wind exposure does the site carry. Answer those and the system type narrows quickly.

  • Attachment points: Is there a sound wall for an awning, or does the area need freestanding sails?
  • Adjustability: Does the space need shade that moves with the sun, or fixed coverage?
  • Wind exposure: What does the site’s wind load requirement demand of the frame and anchors?
  • Fabric: Solution-dyed acrylic for colorfastness; marine-grade thread for salt air
  • Frame: Powder-coated steel or aluminum sized to the wind load
  • Warranty: Ask what is covered and for how long on both workmanship and material
  • Service: Confirm the installer also handles repairs and restitching

Conclusion

Getting shade right on a commercial patio means solving for wind, salt, and sun at once, and that is where most off-the-shelf systems fall short. A to Z Awnings & Marine Canvas manufactures custom shade solutions with hundreds of premium Sunbrella fabrics, a 10-year warranty on workmanship, and a 10-year warranty on Sunbrella material, backed by full-service manufacturing and repairs.

Frequently Asked Questions

What are the most durable shade materials for high-heat environments?

Solution-dyed acrylic fabrics such as Sunbrella hold color and resist UV degradation far better than printed or dyed-after-weave fabrics, because the pigment runs through each fiber rather than sitting on the surface. High-density polyethylene works well for shade sails because it breathes and lets heat escape. Frames matter just as much: powder-coated steel or marine-grade aluminum resist rust and corrosion in coastal air. A 10-year warranty on both material and workmanship is a reasonable signal that a manufacturer expects the fabric and frame to hold up under constant sun.

Do commercial shade structures require building permits?

In most cases, yes. Commercial shade systems typically need a permit because they are permanent or semi-permanent structures attached to a building or anchored to the ground, and reviewers want to see wind load calculations for your site. Requirements vary by county and municipality, and coastal areas often apply stricter rules. A contractor who manufactures and installs shade systems locally usually handles the permit paperwork and engineering documentation as part of the project, which saves you from submitting incomplete applications and waiting through repeated review cycles.

How do retractable awnings compare to fixed shade structures?

Retractable awnings give you adjustable coverage: extend them on a bright afternoon, retract them before a storm, and control how much sun reaches your patio throughout the day. They suit restaurants and cafes where flexibility matters. Fixed structures such as shade sails and canopies stay in place year-round and generally handle wind better because there are no moving parts or motors to fail. Many commercial patios combine both, using a fixed canopy over a permanent seating area and a retractable awning over a section that needs seasonal or hourly adjustment.

What is the average lifespan of a commercial patio shade system?

A well-built commercial shade system with solution-dyed acrylic fabric and a powder-coated or aluminum frame commonly lasts 10 to 15 years, and often longer with regular cleaning and prompt repairs. Lifespan depends heavily on sun exposure, salt air, and how quickly you address small problems like loose stitching or a failing motor. Systems that are never cleaned or repaired tend to fail in half that time. A 10-year warranty on workmanship and material gives you a concrete benchmark for what a manufacturer expects from its own product.

Are there specific wind load requirements for shade structures?

Yes. Shade structures must be engineered to resist the wind speeds your area can expect, and coastal counties apply some of the strictest wind load standards in the country. That means the frame, anchors, and fabric attachment points all need to be designed for the load, not just the fabric itself. A shade system that looks solid on a calm day can fail in a storm if its footings or brackets were undersized. Ask any contractor for the engineering documentation behind their wind load rating before you sign.

Heavy Duty Marine Canvas Enclosures: 2026 Guide

Table of Contents

Last Updated: September 30, 2026

Marine Fabric Material Comparison: Solution-Dyed Acrylic vs. Vinyl vs. Polyester

Heavy duty marine canvas enclosures start with the fabric, and three materials dominate: solution-dyed acrylic, marine-grade vinyl, and polyester. Each behaves differently under UV, salt spray, and flexing, so fabric choice drives lifespan and cost.

Hands holding solution-dyed acrylic and vinyl samples for marine canvas enclosures on a sunny boat dock
Fabric UV Resistance Breathability Best For
Solution-dyed acrylic Excellent High Long-term enclosures
Marine-grade vinyl Moderate Low Clear panels, waterproofing
Polyester Fair Moderate Budget covers

Denier, Weight, and Weave: What the Numbers Mean for Durability

Denier measures fiber thickness; higher denier generally means a heavier, more abrasion-resistant fabric. Weight (ounces per square yard) indicates weave density. A tighter weave resists water and seam failure but reduces breathability, which matters for mildew prevention in humid coastal air. For heavy duty use, prioritize tightly woven, higher-denier fabric over weight alone.

Pro Tip
Ask for the fabric’s seam strength and tear strength specs, not just its weight. A heavy fabric with a weak weave fails at the seams long before the panels wear out.

Types of Boat Enclosures: Center Console, Full, and Trailerable Options

Boat enclosures fall into three categories. A center console enclosure wraps the helm and seating while leaving the bow open. Full enclosures cover the entire cockpit and often connect to a hardtop. Trailerable enclosures fold down or detach quickly for highway transport.

Marine Grade Vinyl vs Canvas: Which Is Right for Your Enclosure?

Marine grade vinyl and canvas serve different jobs, and most enclosures use both. Canvas provides structural panels and breathability; vinyl, usually clear isinglass or polycarbonate windows, provides visibility and waterproofing.

Isinglass and Polycarbonate: Transparency, Flexibility, and Long-Term Clarity

Isinglass is flexible clear vinyl that rolls and folds with the canvas. It offers good transparency when new but scratches and yellows with UV exposure. Polycarbonate panels are rigid, resist scratching far better, and hold clarity longer, but they don’t roll up and cost more. For a trailerable enclosure that folds often, isinglass is practical; for a permanent full enclosure where clarity matters most, polycarbonate earns its price.

Watch Out
Rolling isinglass panels while they’re cold can crack them. In cooler months, let panels warm in the sun before folding, or store them flat.

Custom Boat Enclosure Cost: What Drives the Price and How to Budget

Custom boat enclosure cost depends on four variables: total square footage, fabric grade, panel type, and hardware complexity. A center console enclosure with standard isinglass costs less than a full enclosure with polycarbonate windows, stainless steel framing, and custom zippers.

UV and Water Resistance Standards: What to Look for in Heavy Duty Fabric

UV resistance and water resistance are separate properties, and heavy duty fabric needs both. Most buyers compare marketing language, “UV-treated,” “marine-grade,” “weatherproof”, instead of test methods. Knowing the standards behind a spec sheet makes comparison easier.

The Test Methods Behind the Claims

UV resistance is expressed through two measurements. The first is colorfastness to light, most often run under AATCC Test Method 16 (commonly the Option E, 20-hour or 40-hour xenon-arc cycle), graded on a 1-5 Gray Scale where 5 means negligible color change. The second is tensile strength retention after accelerated weathering, usually ASTM G154 (fluorescent UV) or ASTM G155 (xenon-arc).

Climate-Specific Performance: What Changes by Region

Generic guides treat “marine environment” as one condition. It is not, and the fabric that wins in one climate can underperform in another.

How to Read a Spec Sheet

When comparing fabrics, ask the supplier for four numbers: AATCC 16 colorfastness rating, tensile strength retention after ASTM G154 or G155 exposure, AATCC 127 hydrostatic resistance, and ASTM E96 moisture vapor transmission. If a supplier cannot produce those, “heavy duty” is a marketing term, not a specification.

Pro Tip
Match the fabric to your dominant failure mode, not to the highest number on the spec sheet. A high-hydrostatic, low-MVTR fabric is the wrong choice for a humid climate even though it looks stronger on paper.
Watch Out
Do not assume a fabric rated for years of outdoor exposure is rated for years of marine exposure. Salt, UV dose, and constant flexing at the seams are a harsher combined test than any single accelerated weathering standard replicates.

Hardware and Framing Components: Anodized Aluminum, Stainless Steel, and Zipper Systems

Hardware fails before fabric does in most marine environments. Fabric degrades gradually and visibly; metal degrades in ways you often cannot see until a fitting fails under load. Understanding the corrosion mechanisms separates a frame that lasts a decade from one that needs re-fitting in three seasons.

Anodized Aluminum: Light, Cheap, and Finite

Anodized aluminum tubing is the default frame material for most enclosures because it is roughly a third the weight of steel and costs less. The anodized layer is a controlled aluminum oxide coating that forms a barrier against the atmosphere. In fresh water and mild coastal air, that barrier holds up well.

Stainless Steel: The Alloy Grade Is the Whole Story

“Stainless steel” is not a single material. The grade determines whether hardware survives saltwater or rusts within a season.

Call us today for a free estimate →

  • 304 stainless is the common general-purpose grade. It resists fresh water and mild exposure well, but in saltwater it is prone to pitting and crevice corrosion, especially at welds and under fittings where oxygen cannot reach the surface. It is the grade most often sold as “marine” hardware at big-box retailers, and the one most likely to disappoint a saltwater owner.
  • 316 stainless adds molybdenum, which substantially improves resistance to chloride pitting and crevice corrosion. It is the standard for saltwater marine hardware, snaps, hinges, fasteners, and frame fittings that live in spray. The cost premium over 304 is modest relative to replacing corroded hardware and the canvas it damages.
  • 316L is the low-carbon variant of 316, used where welding is involved because it resists sensitization (the chromium depletion that makes weld zones corrode first). If a frame is welded, 316L at the welds matters.

The Cost-Benefit Trade-Off in Saltwater

The honest comparison is not “which metal is better” but “which failure mode can you tolerate.” Anodized aluminum fails by pitting at stress points, often without visible warning, and cannot be field-repaired structurally. Stainless steel fails by surface staining and, in the wrong grade, crevice corrosion at fittings, both visible during routine inspection and addressable before structural failure.

Zippers, Snaps, and Tensioning Systems

Zippers are the most common point of enclosure failure, and the failure is usually mechanical before chemical. A corroded slider binds, the binding concentrates force on the teeth, and the teeth deform. Once teeth deform, the zipper is done, no field repair restores it.

What to specify:

  • Zipper teeth and slider: corrosion-resistant metal (316 stainless where available) or high-quality molded resin. Resin zippers do not corrode, but they tolerate misalignment and grit poorly.
  • Zipper tape: UV-stabilized, because the tape fails from sun exposure before the teeth wear out.
  • Snaps and fasteners: 316 stainless. A 304 snap in continuous salt spray will stain and seize within a season or two.
  • Tensioning: shock cord, turnbuckles, or strap systems that keep panels taut without overstressing seams. Over-tensioning is a common cause of seam failure, the fabric is strong, but the stitch line is the weak link.

Inspection Schedule That Actually Prevents Failures

Hardware inspection is cheap; hardware failure is not. A practical routine:

  1. Monthly in saltwater use: rinse all metal with fresh water, work every zipper through its full travel, and check snaps for stiffness.
  2. Seasonally: inspect frame tubing at bends and under fittings for pitting or white aluminum oxide residue. Inspect stainless for rust staining, which signals crevice corrosion starting under a fitting.
  3. Annually: check every fastener for tightness and every weld for cracking. Re-lubricate zippers with a silicone-based marine lubricant.
Key Takeaway
Budget hardware as a real cost, not an afterthought, and budget it by exposure, not by total frame length. The fittings, snaps, and zippers that live in spray are where the money should go. Upgrading those to 316 stainless while keeping anodized aluminum frame tubing is usually the highest-return decision in the entire enclosure.
Watch Out
Do not mix stainless fasteners into an aluminum frame without an isolating barrier. Dissimilar metals in a wet, salty environment create a galvanic couple, and the aluminum will corrode preferentially around the fastener, often invisibly, until the fitting pulls out.

Marine Canvas Maintenance Tips: Cleaning, Mold Prevention, and Zipper Care

Marine canvas maintenance tips come down to three habits: regular cleaning, moisture control, and zipper care. Rinse fabric with fresh water to remove salt and dirt, then clean with a mild soap and soft brush. Avoid harsh detergents, which strip protective finishes.

Repair and Patching Techniques for Heavy Duty Marine Canvas Enclosures

Small damage doesn’t require full replacement. For tears, a peel-and-stick canvas patch on a clean, dry surface handles minor repairs. For seam failures, restitching with UV-resistant thread restores strength. Isinglass scratches can sometimes be polished out with a plastic cleaner.

Frequently Asked Questions

What is the most durable material for marine canvas enclosures?

Solution-dyed acrylic canvas is the most durable choice for heavy duty marine canvas enclosures. The color is locked into the fibers before weaving, so it resists fading from UV exposure far better than surface-dyed fabrics. It also breathes, which reduces mildew growth in humid coastal conditions. Marine-grade vinyl offers better waterproofing and transparency for windows, but it does not breathe and can crack over time. For long-term durability in salt air, acrylic canvas with vinyl or polycarbonate panels is the strongest combination.

How long do heavy duty marine canvas enclosures typically last?

With proper care, a quality marine canvas enclosure made from solution-dyed acrylic or marine-grade vinyl can last 7 to 10 years or more. Lifespan depends on sun exposure, salt air, how often the enclosure is used, and whether you clean and treat it regularly. Storing the enclosure during off-season months and addressing small tears before they spread will extend its life. A 10-year warranty on both workmanship and materials gives you a reliable benchmark for expected durability.

Is custom marine canvas worth the investment for older boats?

Yes, if the boat is structurally sound and you plan to keep it. A custom enclosure protects upholstery, electronics, and gelcoat from UV and salt damage, which preserves resale value. It also extends your usable boating season by blocking wind and spray. Ready-made covers rarely fit older hulls with non-standard angles, leaving gaps where water and sun get in. A custom fit ensures full coverage and better performance. The cost is typically recouped through reduced interior wear and a higher selling price.

What is the difference between marine-grade canvas and standard outdoor fabric?

Marine-grade canvas is engineered for constant exposure to salt, UV radiation, and moisture. It uses solution-dyed acrylic or heavy denier polyester with mildew-resistant treatments, corrosion-resistant hardware, and reinforced seam strength. Standard outdoor fabric may look similar but lacks the UV stability, water repellency, and abrasion resistance needed for a marine environment. Using standard fabric on a boat often leads to rapid fading, mold, and seam failure within a season or two. Always verify the fabric is rated for marine use.

How do I maintain and clean heavy duty marine canvas to prevent mold?

Brush off loose dirt, then wash with mild soap and lukewarm water using a soft-bristle brush. Rinse thoroughly and let it air-dry completely before closing the enclosure. Never use harsh detergents, bleach, or abrasive cleaners, as they strip protective coatings. For mold spots, a diluted vinegar solution can help, but test a small area first. Lubricate zippers with a silicone-based product, and check snap fasteners for corrosion. Regular cleaning every few months prevents mildew and keeps the fabric breathable.

What are the benefits of using Sunbrella fabric for boat enclosures?

Sunbrella is a solution-dyed acrylic fabric known for excellent UV resistance, mildew resistance, and colorfastness. It breathes, which reduces condensation and mold growth inside the enclosure. It also resists fading and abrasion, maintaining its appearance after years of sun exposure. Sunbrella offers hundreds of colors and patterns, so you can match your boat’s aesthetic. A 10-year warranty on Sunbrella material backs its long-term performance. It is one of the most trusted fabrics for marine canvas enclosures in saltwater environments.


Heavy duty marine canvas enclosures reward careful material choices, and the wrong fabric or hardware costs you a replacement years sooner than necessary. A to Z Awnings & Marine Canvas builds custom enclosures using premium Sunbrella fabrics, corrosion-resistant hardware, and a full-service repair shop, all backed by a 10-year warranty on workmanship and materials. Call us today for a free estimate and get an enclosure fitted to your boat, your climate, and your budget.

Is Professional Awning Installation Worth It?

Table of Contents

Last Updated: September 28, 2026

Professional Awning Installation vs DIY: A Quick Comparison

Homeowners searching for shade usually ask the same question first: is professional awning installation worth the extra money? At A to Z Awnings & Marine Canvas, the short answer is yes for most people, because the labor you pay for covers structural anchoring, wind-load planning, and warranty compliance that a boxed kit cannot provide. The real decision is not “kit versus custom.” It is “one afternoon versus the next fifteen years.”

Factor Professional Installation DIY Installation
Upfront cost Higher (labor included) Lower (product only)
Anchoring system Engineered for your wall type Whatever ships in the box
Warranty coverage Full manufacturer warranty intact Often voided
Wind load rating Verified against local code Unknown
Expected service life 10-15 years with care Varies widely
Insurance treatment Documented, insurable May be excluded after damage

What the Cost of Retractable Patio Awnings Actually Covers

The cost of retractable patio awnings is not one number. It bundles the fabric, the awning frame, the motor if you choose a motorized awning, the mounting hardware, and the professional labor to install it correctly.

Watch Out
A low advertised price almost always excludes installation, mounting hardware upgrades, and permit-related work. Budget for the full system, not the box.

Upfront Cost vs Long-Term Value

Think in terms of service life, not sticker price. A properly anchored awning that lasts a decade or more spreads its cost across years of daily shade. A cheaper unit that sags, leaks, or tears in two seasons has to be replaced, and you pay the labor twice.

Pro Tip
Ask any installer for the wind-load rating and anchoring spec in writing before you sign. If they cannot produce it, they are guessing.

DIY Awning Installation Risks That Cost More Than Labor

DIY awning installation risks rarely show up on day one. They show up in the first strong wind, the first heavy rain, or the first time you try to file a warranty claim.

Common DIY Failure Points

  • Brackets fastened into siding instead of a load-bearing wall or properly reinforced blocking
  • Mounting hardware swapped for whatever was in the toolbox instead of rated fasteners
  • Missing or incorrect torque on bolts, causing gradual loosening
  • No slope or pitch set, so water pools on the fabric
  • Fabric tension set wrong, leading to sagging and premature fabric replacement

Each of these is fixable by a professional in an afternoon. Left alone, they shorten the life of the awning frame and can void your warranty coverage entirely.

Awning Installation Warranty Requirements and Why They Matter

Awning installation warranty requirements are the part most buyers ignore until something breaks. Manufacturers typically condition coverage on three things: installation by a qualified professional, use of specified mounting hardware, and adherence to a stated mounting height, pitch, and anchor pattern. Break any one of those conditions and the claim can be denied, even if the defect has nothing to do with the installation itself.

The Clauses That Actually Get Cited in Denials

When a manufacturer denies a claim, it usually points to one of a small set of standard exclusions. Knowing them in advance is the difference between a covered repair and an out-of-pocket one:

  • Improper installation. The most common denial. If the awning was not installed by an approved or licensed installer, or was not installed to the published spec, coverage for the frame, fabric, and motor can all fall away at once.
  • Non-specified fasteners. Many warranties name the anchor type and minimum embedment depth. Substituting a hardware-store lag bolt for a rated masonry anchor is a documented reason for denial.
  • Unauthorized modification. Cutting the frame, re-pitching the arms, or adding aftermarket brackets typically voids coverage on the affected components.
  • Failure to maintain. Most warranties require periodic cleaning and inspection. Skipping it can be used to deny a claim even when the root cause is a manufacturing defect.
  • Improper storage or retraction. For retractable units, leaving the awning extended during high wind or failing to retract it per the manual is a common exclusion.

Why the Paper Trail Matters as Much as the Install

A professional installer who works with a given manufacturer regularly will typically file the installation paperwork, register the product, and keep the anchor spec and torque values on record. That paper trail is what you hand the manufacturer when you file a claim. A DIY install rarely produces it, which is why so many DIY warranty claims stall at the first request for documentation.

The warranty is only as good as the installation behind it. Professional installation is what keeps your coverage valid, and the installer’s records are what prove it.

The Insurance Angle Most Guides Skip

Homeowners insurance is the second layer of protection, and it behaves differently from a manufacturer warranty. A wind or hail claim on an awning is generally handled under the dwelling or other-structures coverage on your policy. Two things affect whether that claim pays:

Call us today for a free estimate →

  • Whether the awning was permitted and inspected. An unpermitted structure can complicate or reduce a claim, and some carriers exclude structures that were not built to local code.
  • Whether the installation was documented. A receipt and installation record showing rated anchors and a code-compliant wind-load rating makes the claim straightforward. A DIY install with no documentation invites questions about whether the loss was caused by the storm or by the installation.

How Professional Installation Protects Structural Integrity and Property Value

Structural integrity is the reason professional installation pays for itself, but the value is easier to see when you look at how DIY installs actually fail. The failures are not random. They cluster around a handful of predictable points, and each one is preventable in an afternoon by someone who installs awnings weekly.

Professional installers using a drill and level for professional awning installation on a sunny patio wall.

Where DIY Installations Actually Fail

  • Anchoring into the wrong substrate. The single most common failure. Brackets driven into vinyl siding, stucco over foam, or a hollow wall look secure until a gust loads the arm. The fastener pulls through, the frame tears loose, and the awning becomes a projectile. The fix is identifying the load-bearing wall or installing engineered blocking behind the mounting point.
  • Undersized or mismatched fasteners. A lag bolt into brick is not the same as a wedge anchor into brick. Using the wrong anchor for the substrate is a documented cause of pull-out, and it is invisible until the first real wind event.
  • Missing or incorrect torque. Bolts that are not torqued to spec loosen gradually under the constant load of a retracted arm. By the time the homeowner notices, the bracket holes are elongated and the wall needs repair.
  • No pitch or slope set. Water pools on the fabric, stretches it, and eventually finds the seams. A correctly pitched awning sheds water before it can pond.
  • Out-of-square frame. A frame that is slightly out of square binds the arms, wears the motor, and stresses the fabric at the seams. It is the failure that shortens service life without ever looking obviously broken.

Wind Load, Snow Load, and Salt Air: Why Climate Changes the Spec

The anchoring spec that works in a sheltered inland yard is not the spec that works on an exposed corner lot or a coastal property. Three regional factors change the engineering:

  • Wind load. Local building codes set a design wind speed, and the anchor pattern and embedment depth have to meet it. An awning rated for a mild inland exposure can be under-anchored for a gusty ridge or coastal site.
  • Snow load. In snow country, the awning has to either be retractable and stowed for winter or engineered to shed a snow load. A flat-pitched DIY install that holds snow is a collapse waiting to happen.
  • Salt-air corrosion. Coastal installations need stainless or hot-dip galvanized hardware. Standard zinc-plated fasteners can corrode through in a few seasons, which is why coastal installs often specify a different anchor and a different maintenance schedule.

The Property Value Side

Curb appeal and property value follow from the same work. A clean, well-fitted awning reads as an intentional upgrade, not an afterthought. For a commercial awning on a restaurant patio, that first impression is the difference between a full outdoor section and an empty one. For a residential install, a properly anchored awning that survives a decade of storms is an asset; a sagging, water-stained one is a repair line item a buyer will price into an offer.

Homeowners and business owners who want the awning to add resale value rather than become a repair line item.

Ask any installer for the wind-load rating, the anchor type, and the embedment depth in writing before you sign. If they cannot produce it, they are guessing.

When the Answer Is Yes: Scenarios Where Professional Installation Pays Off

Professional awning installation pays off fastest in a few specific situations:

  • Coastal and high-wind areas. Salt air and gusty storms punish weak anchoring. Rated hardware and correct mounting are not optional.
  • Motorized awnings. Wiring, switches, and motor alignment are best handled by someone who does it weekly.
  • Commercial setups. Restaurants and retail patios need code-compliant, durable shade that holds up to daily use.
  • Older or irregular structures. Odd angles and aging walls need a custom fit, not a one-size kit.
  • Anyone who values the warranty. If you want the coverage to mean something, the installation has to qualify.

Frequently Asked Questions

What is the average cost of having an awning professionally installed?

Professional awning installation pricing depends on awning size, fabric choice, motorization, and mounting complexity. The cost of retractable patio awnings typically includes the awning unit, mounting hardware, labor, and any electrical work for motorized models. Because every installation is custom, most companies provide project-based quotes rather than flat rates. For an accurate number, request a free estimate from a licensed awning dealer who can assess your specific wall type, projection needs, and fabric selection.

Does an awning add value to a house?

A professionally installed awning can improve curb appeal and make outdoor spaces more usable, which matters to buyers touring a home. It also reduces sun damage on patios, decks, and furniture, and can lower cooling costs by shading windows and doors. While appraisers do not assign a fixed dollar value to awnings, the combination of extended outdoor living space and reduced energy bills makes the home more attractive in competitive markets.

What are the risks of DIY awning installation?

DIY awning installation risks include improper anchoring into non-load-bearing walls, insufficient torque on mounting hardware, and misaligned frames that stress the fabric. These errors can cause the awning to pull free in wind, void the manufacturer’s warranty, and lead to costly repairs. Structural damage to siding, stucco, or masonry is also common when homeowners lack the tools and expertise to identify proper mounting points.

Is it better to hire a professional for retractable awning installation?

For most homeowners, hiring a professional is the safer choice. Professional awning installation ensures the frame is anchored to load-bearing structures, the fabric is properly tensioned, and the warranty remains valid. It also protects against wind load failures and water intrusion. If you choose DIY, verify that your wall can support the awning, use the manufacturer’s specified mounting hardware, and confirm whether self-installation affects warranty coverage.